

Learning how to level a refrigerator is the single best way to stop your doors from swinging open or drifting ajar. You walk away from your fridge, expecting the door to shut behind you with a satisfying “thud,” but instead, it drifts halfway back open.
These aren’t just annoyances; they are signs that your appliance is off-balance.
An unlevel fridge doesn’t just annoy you; it wastes energy. If your unit isn’t tilted correctly, gravity can’t help the doors seal shut. This leads to air leaks, spoiled food, and a compressor that runs non-stop. Furthermore, an unlevel fridge vibrates, causing loud buzzing noises that can drive you crazy.
In this guide, we will show you exactly how to level a refrigerator properly. We will cover how to find the leveling refrigerator legs, which way to turn them, and the specific “backward tilt” secret that makes your doors close automatically.
Why Learning How to Level a Refrigerator Matters
You might think “flat” is the goal, but for refrigerators, “flat” is actually wrong.
A properly installed refrigerator needs to be level side-to-side, but not front-to-back.
-
The Door Seal: By tilting the fridge slightly backward, you use gravity to force the heavy doors shut. This ensures the magnetic gasket seals tight every time.
-
The Drain Pan: Your defrost system relies on gravity to flow water into the drain pan. If the fridge tilts forward, water can miss the pan, leading to a refrigerator leaking water on the floor.
-
The Noise: If the four feet aren’t firmly planted, the cabinet wobbles. This vibration amplifies the compressor sound, creating a loud refrigerator buzzing noise.
Tools You Need to Learn How to Level a Refrigerator
You don’t need a pro toolkit. You likely have everything in your junk drawer.
-
A Carpenter’s Level: Ideally a 24-inch level, but a small torpedo level works too.
-
A Wrench or Pliers: An adjustable crescent wrench is best for turning the feet. Some fridges need a hex-head driver (screwdriver).
-
A Helper: Having someone to lean the fridge back slightly takes the weight off the legs, making them easier to turn.
-
A Flathead Screwdriver: To pop off the front kick-plate.
Step 1: Accessing the Legs (The First Step in How to Level a Refrigerator)
Before you can adjust anything, you need to expose the mechanism.
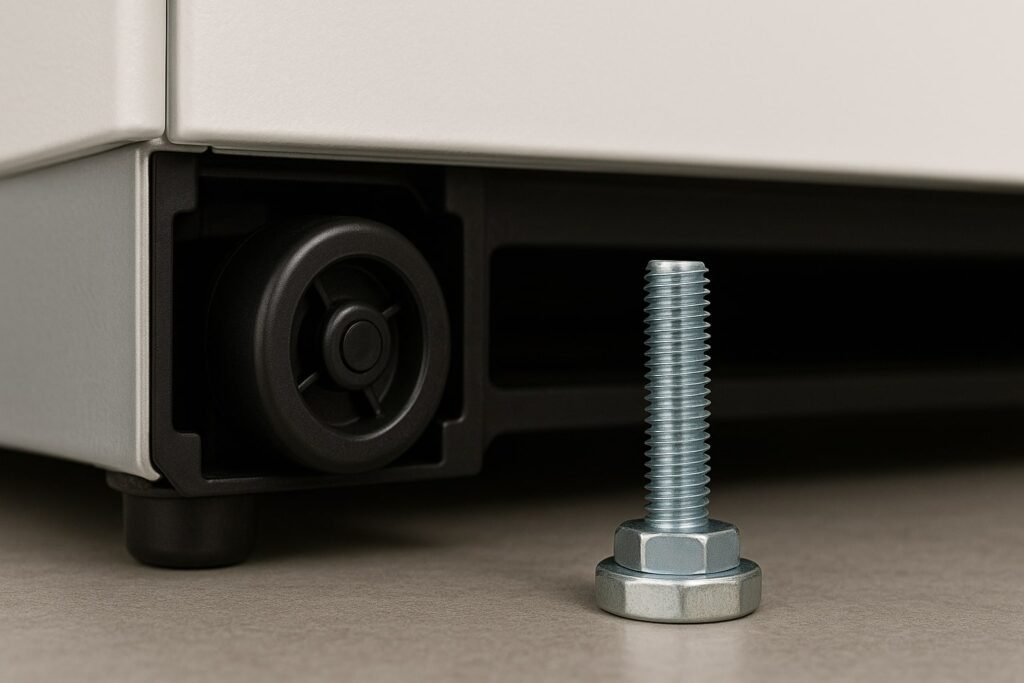
Remove the Kick-Plate/Grille: The leveling legs are located at the bottom front corners of the fridge. They are usually hidden behind a plastic grille (kick-plate).
-
Removal: Most grilles simply snap off if you pull them straight out. Some have two small screws on top or clips on the side. Use your flathead screwdriver to gently pry it loose.
Identify the Mechanism: Look closely at the front corners. You will see two things:
-
Rollers (Wheels): These allow you to roll the fridge. They do not adjust the level.
-
Leveling Legs (Feet): These are threaded metal or plastic bolts with a flat foot pad. These are what we need to turn.
Note: If the legs are raised too high, the fridge rests on its wheels. If the legs are lowered, they lift the wheels off the ground and lock the fridge in place.
Step 2: How to Level a Refrigerator Side-to-Side (The Wobble Fix)
Your first goal is to stop the side-to-side wobble.
The Process:
-
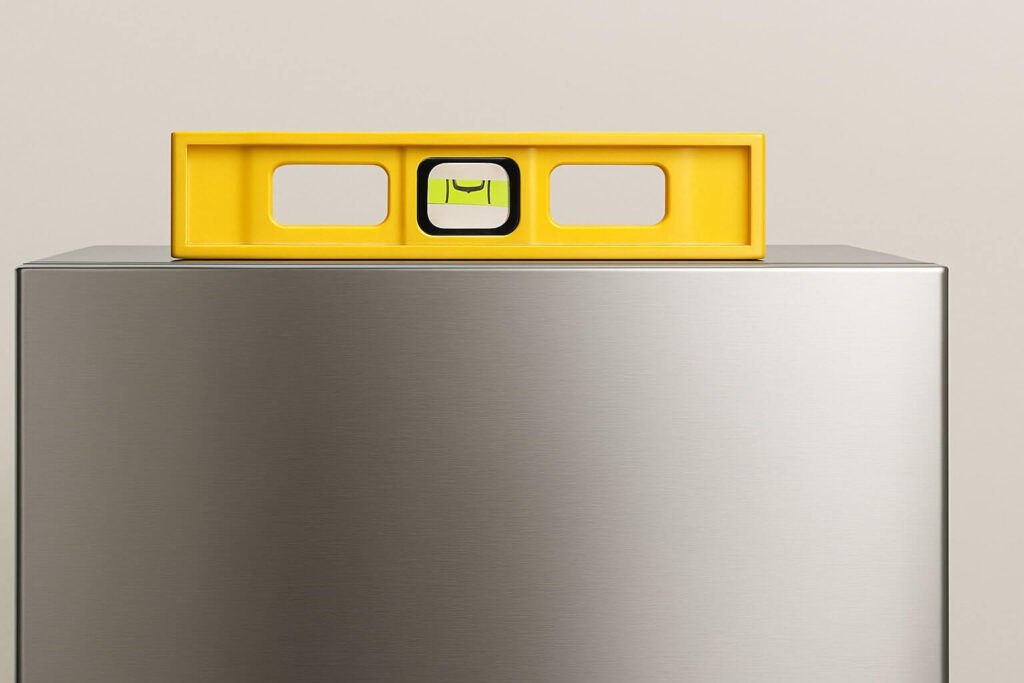
Place the Level: Put your carpenter’s level on the top of the refrigerator, running from left to right near the front edge.
-
Check the Bubble: Is it centered? If the bubble leans to the left, the right side is too high (or the left is too low).
-
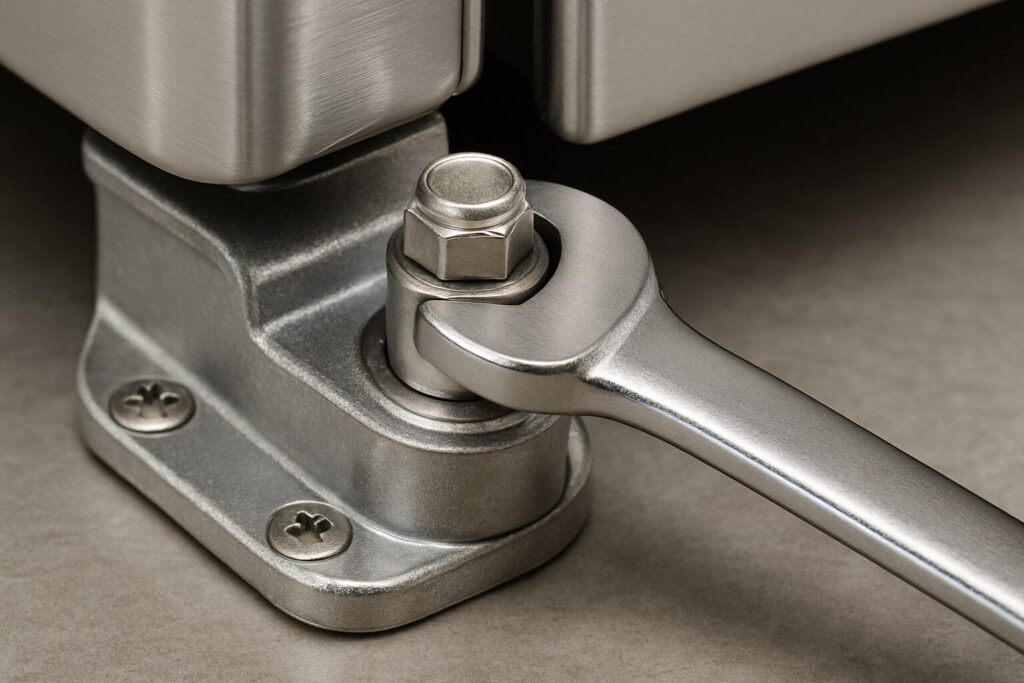
Adjust the Legs: Using your wrench, turn the leveling refrigerator legs.
-
Clockwise: Usually lowers the leg (lowers that corner).
-
Counter-Clockwise: Usually extends the leg (raises that corner).
-
Tip: Have a helper push the top of the fridge slightly to lift the weight off the leg while you turn it.
-
-
Verify: Keep adjusting until the bubble is perfectly centered in the middle lines. This ensures your doors look straight and the fridge doesn’t vibrate.
Step 3: Front-to-Back Leveling (So the Door Closes)
This is the most critical step. This is where we fix the refrigerator door swings open problem.
The Goal: You want the refrigerator to tilt backwards just enough so that gravity pulls the door shut, but not so much that items slide off the shelves. The industry standard is a 1/4 inch tilt.
The Process:
-
Re-Position the Level: Place your level on top of the fridge again, but this time running from front to back.
-
Check the Bubble: You want the bubble to be slightly forward of the center line (indicating the front is higher than the back).
-
Adjust the Front Legs: Turn both front leveling refrigerator legs counter-clockwise to extend them. You are lifting the front of the fridge up.
-
The “Door Test”: Open the refrigerator door about 45 degrees and let go.
-
Does it stay still? You need more tilt. Raise the front legs more.
-
Does it swing shut? Perfect. You have successfully leveled it.
-
Step 4: Adjusting Uneven Doors
Sometimes, you master how to level a refrigerator cabinet perfectly, but the doors themselves still look crooked. One door might be higher than the other.
The Fix: Most modern French-door fridges have adjustable hinges.
-
Locate the Pin: Look at the bottom hinge of the refrigerator door (not the freezer). You will often see a nut or a pin.
-
Turn the Nut: Use a wrench to turn the nut under the door hinge.
-
Turning it to the right usually raises the door.
-
Turning it to the left usually lowers the door.
-
-
Align: Adjust until the tops of the two doors are perfectly aligned with each other.
Troubleshooting: Problems When Learning How to Level a Refrigerator
In older units, this process can be tricky because parts get stuck.
Problem: The Legs Won’t Turn If the leveling legs are frozen in place by rust or gunk:
-
Lubricate: Spray a little WD-40 or penetrating oil on the threads. Wait 10 minutes.
-
Protect the Floor: If you have to fight the wrench, put a piece of cardboard under the wrench so you don’t scratch your kitchen floor if it slips.
Problem: The Floor is Uneven If your kitchen floor has a dip or sag, the legs might not extend far enough.
-
Shim It: You may need to place a wooden shim or a flat tile under the leg to give it a solid base.
Related Issues: Leaks and Gaps
If your fridge isn’t level, it causes other headaches.
-
Door Gaps: If the tilt is wrong, the magnetic seal might not touch the frame. This leads to a refrigerator door not closing completely, letting warm air in.
-
Leaking: If the fridge tilts forward, defrost water can miss the drain hole. This leads to a refrigerator leaking water on the floor near the front legs.
Frequently Asked Questions (FAQ)
-
How much should a refrigerator tilt back? The general rule is that the front of the refrigerator should be about 1/4 inch (6mm) to 1/2 inch (13mm) higher than the back. This provides enough angle for the refrigerator door swings open force to actually pull it shut.
-
Can I level a refrigerator with wheels? The wheels themselves usually aren’t adjustable. However, the leveling refrigerator legs in front of the wheels are. When you screw the legs down (counter-clockwise), they push against the floor and lift the wheels off the ground. This locks the fridge in place.
-
Do I need to level the back of the fridge? Usually, no. Most refrigerators only have adjustable legs at the front. The rear rollers are fixed height. You control the entire pitch of the appliance by adjusting only the two front legs.
-
Why does my fridge wobble when I open the door? This means one of the legs isn’t touching the floor firmly. Even if the fridge looks straight, one leg might be “floating” slightly. Reach down and turn that leg until it makes solid contact with the floor to stop the wobble.
Conclusion: A Balanced Appliance
Knowing how to level a refrigerator is a simple skill that pays off instantly. Your doors will seal tighter, your compressor will run quieter, and you won’t have to nudge the door shut every time you grab a snack.
Your Action Plan:
-
Remove the Grille: Expose the feet.
-
Stop the Wobble: Level side-to-side.
-
Create the Tilt: Raise the front legs until the door swings shut on its own.
With just a wrench and a level, you can fix the annoyance of a drifting door in under 20 minutes.


