

Learning how to clean refrigerator coils is the single most profitable 15 minutes you can spend in your kitchen. Most homeowners completely ignore this vital maintenance task, yet it is the ultimate key to extending the life of your expensive appliance and preventing catastrophic mechanical failures.
Your refrigerator is essentially a heat-moving machine. It does not “create” cold; rather, it pulls ambient heat out of your groceries and dumps that heat into your kitchen through winding black metal tubes called condenser coils. These coils act exactly like the radiator on your car.
Because they are usually located near the floor, these coils act as a magnet for household debris. If they get wrapped in a thick, insulating blanket of dust, pet hair, and lint, they physically cannot release that heat. As a result, the heavy compressor has to work twice as hard, your electricity bill spikes, and your sealed cooling system eventually overheats and dies.
In this comprehensive guide, we will show you exactly how to clean refrigerator coils like a professional appliance technician. We will help you definitively answer the confusing question of “where are my refrigerator coils,” show you which specific cleaning fridge coils brush to buy, and walk you through the mandatory safety steps to prevent damaging your fridge or flooring.
💡 Mentor’s Diagnostic Hub
Dealing with multiple cooling issues? Dirty coils are often just one part of a failing cooling cycle. Learn how to diagnose every part of your appliance’s sealed system and airflow.
Why You Must Learn How to Clean Refrigerator Coils
You might think a little dust under the fridge is harmless, but for a refrigeration system, it acts as a suffocating thermal blanket.
According to the U.S. Department of Energy, dirty condenser coils severely restrict heat transfer, forcing your refrigerator to use significantly more electrical energy to achieve the same target temperature. This inefficiency creates a rapid domino effect of expensive problems:
- Higher Utility Bills: Your fridge runs longer and draws more amperage to do the same amount of cooling work, directly impacting your monthly electric bill.
- Premature Compressor Failure: The compressor engine relies on heat dissipation to survive. When trapped under dust, it overheats, leading to a catastrophic mechanical breakdown that easily costs $500 to $800+ to fix.
- Food Safety Risks: If the coils are entirely choked, the fridge simply cannot maintain the FDA-recommended 37°F. The internal temperature will slowly rise, causing rapid dairy and meat spoilage.
By performing this simple 15-minute cleaning routine once every 6 months (or every 3 months if you have heavy-shedding indoor pets), you can actively prevent these expensive headaches and add years to your appliance’s lifespan.
Step 1: Where Are My Refrigerator Coils?
Before you can clean them, you have to find them. Modern appliance manufacturers excel at hiding these ugly metal coils to make the appliance look sleek and integrated in your kitchen. Finding exactly where are my refrigerator coils depends heavily on the age and style of your specific unit.
Location A: The “Bottom-Front” Coils (Most Modern Models)
On the vast majority of modern residential refrigerators (especially Whirlpool, GE, LG, and Frigidaire models built in the last 15 years), the coils are tucked tightly underneath the bottom floor of the unit.
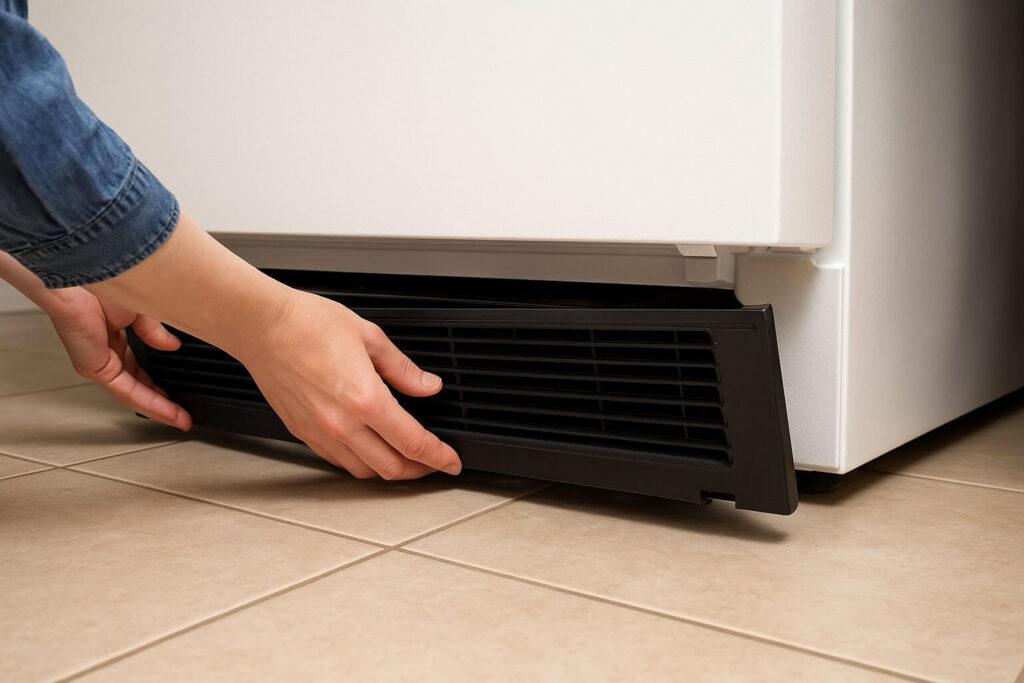
- Access: They are brilliantly accessible directly from the front. You usually do not need to pull the heavy fridge out of its alcove. You simply remove the plastic, vented “kick-plate” or grille at the very bottom near the floor.
Location B: The “Rear-Mounted” Coils (Older or Basic Models)
On units manufactured before 2005, or on smaller apartment-sized and garage fridges, the coils are a large, black, wire grid mounted vertically on the entire exterior back wall of the refrigerator.
- Access: You must physically pull the refrigerator away from the wall to reach them. Because they are exposed, they are incredibly easy to wipe down.
Location C: The “Bottom-Back” Coils (High-End & Built-Ins)
On some high-end, counter-depth, or built-in models (like Sub-Zero or certain KitchenAid units), the coils are located underneath the chassis, but they are behind a solid front panel and are only accessible from the rear machine compartment.
- Access: You will need to carefully pull the fridge out, unplug it, and use a nut driver to remove the lower cardboard or vented metal machine cover on the back.
Step 2: Tools You Need for Cleaning Fridge Coils Brush Work
You absolutely cannot do this job effectively with just a wet rag or a standard broom. The condenser coils are tightly wound in a zig-zag pattern, and the metal heat-dissipating fins are sharp and fragile. You need specialized tools that can reach deep into the dark crevices without puncturing the pressurized copper tubing.
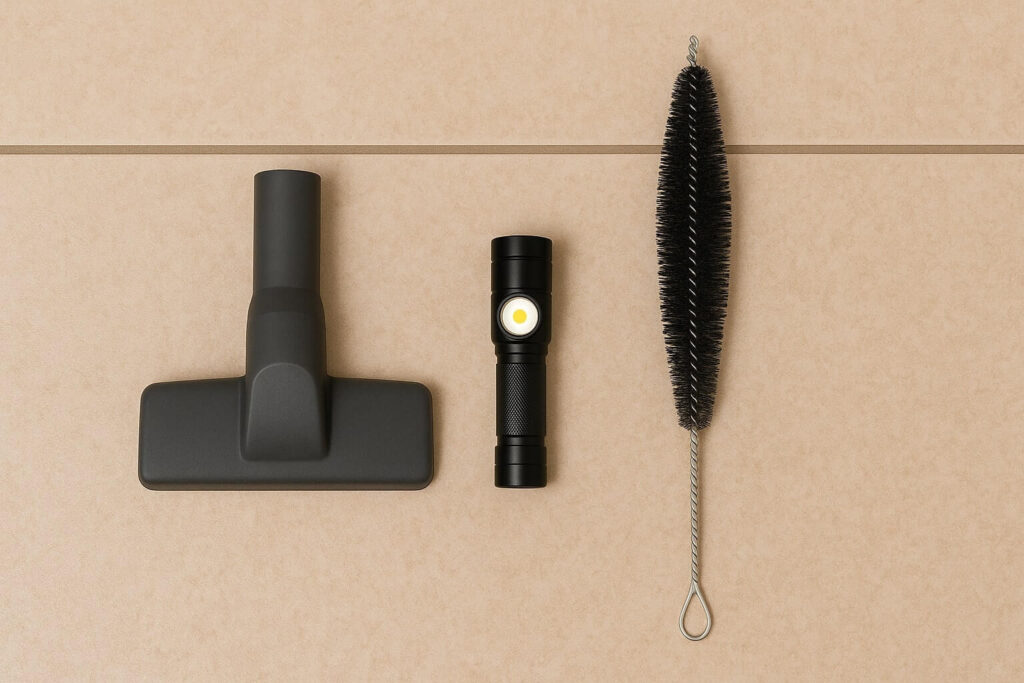
The Essential Tool Kit:
- A Vacuum Cleaner: Ideally, a shop-vac or a household vacuum equipped with a narrow hose crevice attachment to catch airborne dust.
- A Long-Bristle Brush: This is completely non-negotiable. A dedicated cleaning fridge coils brush is designed to be extra long (usually 24+ inches), highly flexible, and tapered specifically to snake between the tight appliance tubes.
- A Bright Flashlight: It is exceptionally dark under the fridge chassis, and you need to see where you are jabbing the brush.
- A Dust Mask: You are about to disturb years of compacted, airborne dust, dander, and potential mold spores. Protect your lungs.
Step 3: Safety First (Power and Prep)
Safety is critical when working near high-voltage electrical appliances and pressurized gas lines.
Disconnect Power
Always, without exception, unplug the refrigerator from the wall outlet before you start. If your fridge is built-in or you cannot reach the plug, go to your home’s main electrical panel and flip the circuit breaker labeled “Kitchen” or “Refrigerator.”
Why? You will be aggressively sticking a metal-core brush near the condenser fan motor and live 120V wiring harnesses. If the thermostat clicks and the fan turns on while your brush is jammed in there, it can shatter the plastic fan blades, burn out the motor, or cause a severe electric shock.
Clear the Area and Protect Floors
If you need to pull the fridge out to access rear coils, put down a piece of cardboard, hardboard, or a specialized appliance mat. Refrigerator wheels can easily gauge hardwood or tear linoleum flooring under the immense weight of the appliance.
Step 4: The Process of How to Clean Refrigerator Coils
Now that you are prepped and the power is safely off, here is the professional, step-by-step method on how to clean refrigerator coils effectively.
Phase A: Remove the Grille
If your coils are located at the bottom front, locate the plastic kick-plate.
- Snap It Off: Most modern plates are held on entirely by tension clips. Grab it firmly with both hands near the top edge and pull straight out towards you.
- Check for Screws: Some models feature two small Phillips or 1/4-inch hex screws on the top or bottom edge. Check with your flashlight before yanking to avoid snapping the plastic.
- Wash It: Take this plastic grille to the kitchen sink and wash it with warm soapy water. It is usually the first line of defense and is likely coated in sticky kitchen grease and fuzz.
Phase B: The Vacuum and Brush Combo
This is where the actual thermodynamic maintenance happens.
- Initial Vacuum: Use your vacuum hose to suck up all the loose, massive “dust bunnies” resting directly on the front edge of the coils and on the floor.
- Insert the Brush: Take your flexible cleaning fridge coils brush and gently slide it deep into the tight gaps between the black coil tubes.
- Scrub Gently: Move the brush back and forth in a sawing motion to dislodge the caked-on, compacted dust. Be firm but gentle; you absolutely do not want to bend the delicate metal fins or accidentally disconnect any nearby wiring.
- Vacuum the Airborne Dust: As the heavy dust flies into the air, hold the vacuum hose nozzle right next to where your brush is exiting to catch the debris before it settles back into the machine compartment.
- Repeat: Do this methodically across the entire width of the unit until the brush pulls out clean.
Phase C: The Condenser Fan
While you are down there with your flashlight, look toward the back of the coil assembly for the condenser fan blade (usually situated right next to the black compressor tank).
- Check It: Is the plastic blade caked in sticky lint?
- Clean It: Use a damp rag or the tip of your brush to gently wipe the fan blades clean. A heavy, dirty fan spins slower, moves less air across the coils you just cleaned, and wears out its motor bearings prematurely.
Signs Your Coils Were Dangerously Dirty
How do you know if your 15-minute cleaning session just saved your fridge from an early grave? Look for these previous warning symptoms that should now completely disappear.
1. The Fridge Was Running Constantly
If the coils were heavily clogged, the compressor likely never shut off because the heat couldn’t escape. By cleaning them, you allow the system to breathe and cycle normally. If your unit was exceptionally loud before, check our guide on diagnosing a refrigerator running constantly to see if this cleaning solves the core issue.
2. The Exterior Sides Were Burning Hot
Touch the exterior side walls of your fridge. Were they burning hot to the touch? Certain models use a “Yoder loop” to run heat through the side walls to prevent condensation. If the main coils are clogged, that excess heat gets trapped in the walls. Once clean, the sides should feel cool or only mildly warm, never hot.
3. The Freezer Was Suspiciously Warm
When coils are dirty, the overall cooling capacity plummets. The system prioritizes the freezer, but sometimes it just can’t keep up with the heat load. If your ice cream was turning to soup, verify it wasn’t a freezer not freezing airflow issue first—but clean coils are the foundation of a cold freezer.
Frequently Asked Questions (FAQ)
How often should I clean my refrigerator coils?
Can I use an air compressor instead of a vacuum?
What if I can’t find my refrigerator coils anywhere?
My fridge is still not cooling after cleaning the coils. What now?
Conclusion: A Small Task for Massive Savings
Knowing exactly how to clean refrigerator coils is a true badge of honor for a responsible homeowner. It is a slightly dirty job, but seeing those shiny black coils free of their dust blanket is incredibly satisfying—especially when you realize how much money you just saved.
Your Quick Action Plan:
- Buy the Brush: Order a dedicated, flexible coil brush (do not try to improvise with a broom).
- Locate: Find the kick-plate at the front bottom or the machine panel at the rear.
- Scrub and Vacuum: Aggressively but carefully remove the thick blanket of dust from the tubes.
By keeping these critical heat-exchange coils perfectly clean, you will drastically lower your monthly energy bills, silence your overworked, noisy compressor, and easily add years of reliable life to your refrigerator.


