When a modern refrigerator suddenly stops cooling, the root cause is rarely as simple as a blocked internal air vent or a slightly dirty water filter. Instead, the true failure frequently lies deep within the appliance's complex electrical ecosystem or the heavy-duty sealed compressor system. From appliances that violently trip household circuit breakers the exact moment they are plugged in, to digital display panels constantly flashing cryptic error codes, diagnosing these highly technical issues can feel incredibly intimidating. However, with a basic digital multimeter, a solid understanding of electrical safety, and the right troubleshooting methodology, you can accurately identify and safely fix these catastrophic power failures right in your kitchen. This is our definitive master hub strictly dedicated to solving refrigerator electrical and compressor problems.
Modern refrigerators are no longer just simple insulated boxes with a single mechanical thermostat and a basic motor. Today, high-end appliances operate essentially as highly complex, interconnected computer networks. They rely heavily on highly advanced electronic main control boards (PCBs) to meticulously regulate internal cabin temperature, execute complex automated defrost cycles, and manage the high-voltage powerhouse compressor. Consequently, when severe electrical power fluctuations, lightning strikes, or internal wiring shorts occur, the entire cooling ecosystem can instantly shut down. This sudden failure puts hundreds of dollars of your perishable family food at immediate risk of spoilage.
At the absolute core of this delicate ecosystem sits the compressor. The compressor acts as the beating mechanical heart of your refrigerator's sealed system. It forcefully pumps highly pressurized chemical refrigerant (Freon) through hundreds of feet of intricate copper coils to continuously extract heat. However, if the compressor isn't receiving the correct, steady voltage, or if the fragile starting components attached to its exterior have completely failed due to age and heat, the fridge simply cannot cool. Many times, frustrated homeowners mistakenly assume they need to throw the entire appliance away, believing the incredibly expensive compressor itself has died. Yet, in our professional experience, the actual compressor motor is often perfectly fine. Instead, the small, inexpensive ($20-$40) electrical relay components attached directly to its side have simply burned out. Understanding exactly how the physics of these specific components work can confidently save you thousands in unnecessary replacement costs.
Diagnostic Symptom
Most Likely Electrical Origin
Severity & Urgency Level
Instantly Trips Home Circuit Breaker
Compressor Direct Short-to-Ground / Glass Defrost Heater Ground
Extreme (Immediate Safety & Fire Hazard)
Compressor Shell is Scorching Hot
Locked Rotor State / Catastrophically Failed Condenser Exhaust Fan
Main Control Board Glitch / Blown PCB Varistor from Power Surge
Moderate (Requires Hard Reboot or Board Replacement)
Flashing "ER IF", "FF", or "SY EF"
Ice Maker Fan Malfunction / Evaporator Fan Motor Circuit Issue
Moderate (Requires Specific Component Testing)
1. Diagnosing Modern Electrical Issues with a Multimeter
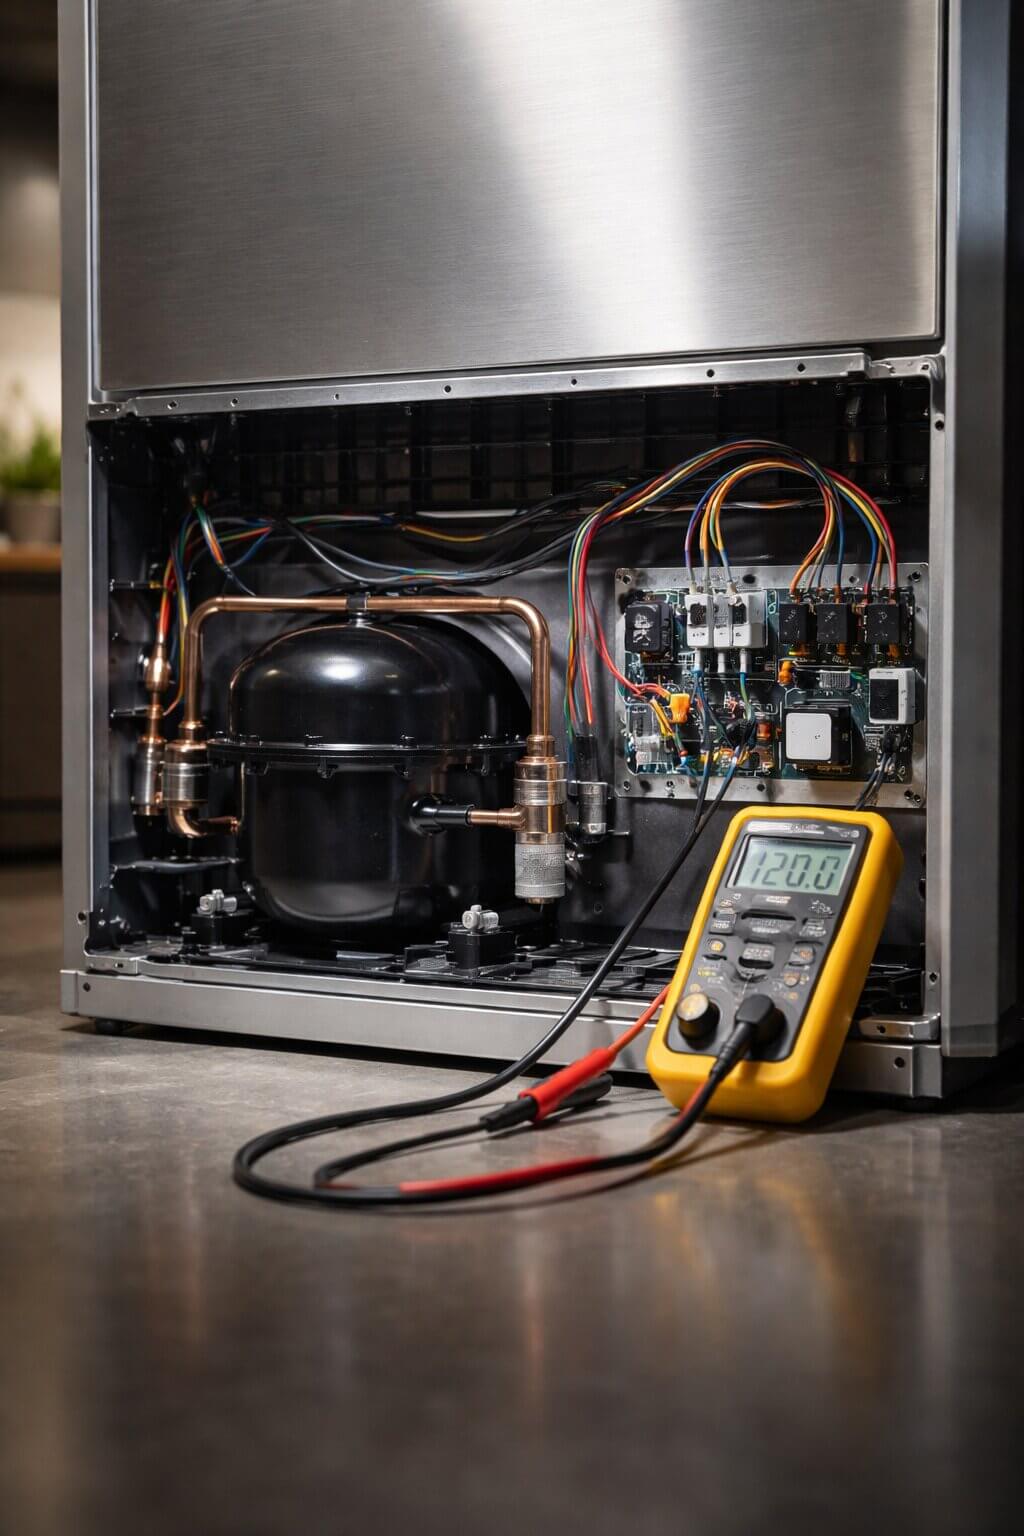
Before you even think about taking heavy steel panels apart or ordering random, expensive parts online, you must understand exactly how high-voltage AC power actively flows through your specific appliance. Electricity enters through the thick wall cord and travels directly to the main control board (usually located behind a galvanized steel panel on the lower back of the unit). Subsequently, the board distributes this power to various high-voltage components (like the compressor and defrost heater). It also steps the power down to low-voltage DC for sensitive sensors, LED lights, and digital display panels.
AC vs. DC Voltage Pathways
Using a digital multimeter is an absolutely non-negotiable requirement for this type of precise, professional-level work. To accurately diagnose these modern machines, you must be thoroughly comfortable interacting with your meter's primary dial. First, you must confidently set your meter to Volts AC (V~) to safely check if a full, clean 120 volts of power is successfully reaching the wall outlet and seamlessly passing through the compressor supply lines.
Secondly, you will frequently need to utilize the Volts DC (V=) setting. This specific setting measures the sensitive 5-volt to 12-volt low-tension communication signals traveling directly from the main control board to the delicate thermistor sensors hidden inside the freezer cabin. Finally, the most common and critical diagnostic tool on your meter is the Ohms / Resistance (Ω) setting. You will routinely use this specific setting on an unplugged refrigerator to rapidly verify whether tiny micro-switches are correctly closing or if fragile internal heating elements have snapped completely.
The Hidden Factory Tech Sheet
To use your multimeter effectively, you absolutely need the manufacturer's diagnostic map. Fortunately, federal law requires appliance manufacturers to hide a "Tech Sheet" inside every single refrigerator before it leaves the factory. You will typically find this small, folded piece of paper securely taped in a plastic bag underneath the front kickplate grille, or hidden beneath the top plastic door hinge cover. This invaluable sheet contains the exact resistance values (Ohms) required to test every single sensor, fan, and heater in your specific model. Trying to blindly guess which complex component is internally failing simply by looking at its plastic exterior is the fastest, most frustrating way to waste hundreds of dollars.
The Golden Rule of Electrical Repair: Always, without exception, unplug your refrigerator directly from the 120V wall outlet before attempting to touch any internal wiring, relay boxes, or exposed control boards. High voltage is incredibly dangerous, unpredictable, and potentially lethal. Furthermore, if you must test live voltage for advanced diagnostics, you absolutely must wear proper Class 0 insulated electrical safety gloves. No DIY diagnostic test is ever worth risking your personal safety.
2. Why Does My Refrigerator Keep Tripping the Breaker?
A refrigerator that instantly, violently trips your GFCI kitchen outlet or the main electrical panel breaker in your garage the exact second it is plugged in represents a massive, critical electrical safety hazard. This aggressive disruption is your home's electrical system working exactly as designed. It is forcefully shutting down the circuit because it actively detects that raw electricity is escaping its intended, safe path.
Navigating GFCI and AFCI Outlets
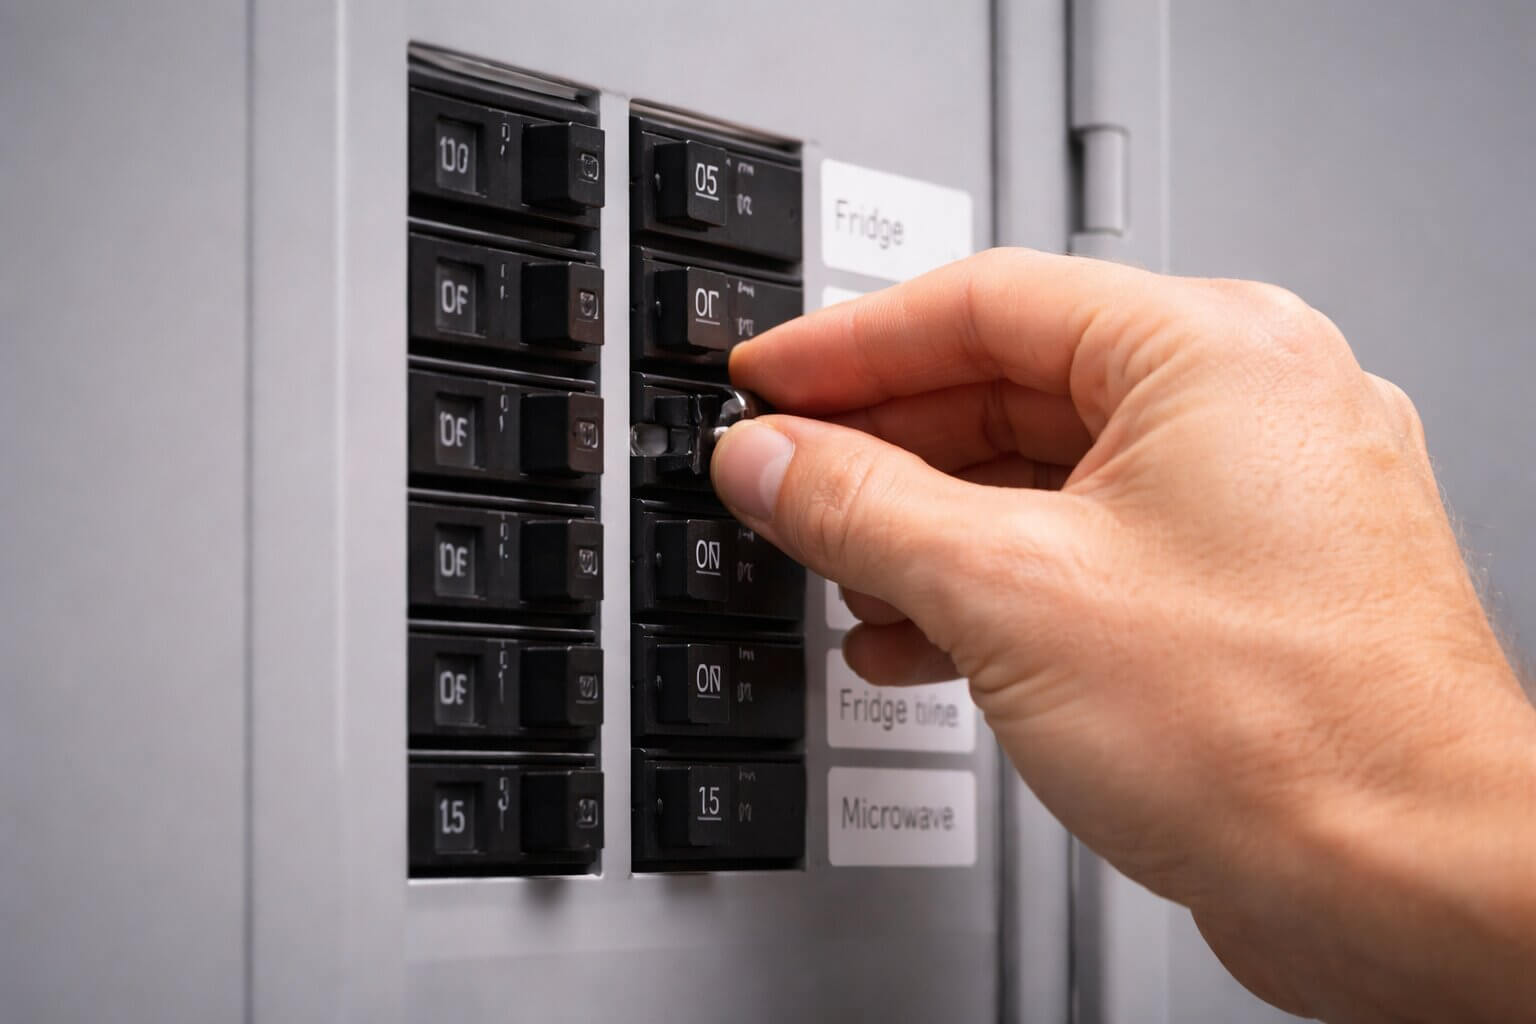
Modern building codes often heavily require refrigerators to be plugged directly into GFCI (Ground Fault Circuit Interrupter) or AFCI (Arc Fault Circuit Interrupter) outlets. However, refrigerators are absolutely notorious for causing "nuisance tripping" on these highly sensitive outlets. The massive compressor motor naturally creates a tiny, completely harmless inductive energy spike every time it cycles on and off. Therefore, if your fridge is continuously tripping a GFCI outlet, the very first diagnostic step is to temporarily plug it into a standard, non-GFCI outlet using a heavy-duty appliance extension cord. If it runs perfectly on a standard outlet, your fridge is perfectly fine. The GFCI outlet itself is simply too sensitive for heavy motor loads. Conversely, if it instantly trips the standard breaker box in your garage, you definitely have a confirmed, catastrophic short circuit hidden inside the machine.
The Defrost Heater Dead Short
While a dead compressor is the most feared cause, a shattered defrost heater is actually the most common reason for a tripped breaker. Hidden behind the rear freezer wall, the defrost system relies on a high-voltage glass heating tube located directly beneath the icy evaporator coils. Unfortunately, as this fragile glass heater expands and contracts daily under extreme temperature shifts, the glass tube can eventually crack open. When the automated timer sends 120 volts of electricity to the heater to melt the ice, melting water drips directly onto the exposed, live heating element. This immediately creates a violent ground fault, instantly popping your house breaker to prevent a kitchen fire.
Compressor Insulation Breakdown
Deep inside the hermetically sealed steel shell of the compressor sits a powerful electrical motor wrapped in tightly coiled copper wire. A microscopically thin layer of protective enamel insulation coats this vital wire. Over a decade of extreme internal heat, acidic refrigerant degradation, and constant physical vibration, this delicate enamel can eventually flake off entirely. Consequently, when the bare copper wire physically touches the internal steel casing of the compressor, the raw electrical current violently jumps directly to the metal frame of the appliance. Your home's safety breakers instantly detect this massive, highly lethal power leak and forcefully shut down the circuit.
3. How to Reset Your Refrigerator After a Power Outage
Intense summer thunderstorms, rolling brownouts, and municipal grid fluctuations can cause sudden, massive power surges. These surges frequently completely freeze or "glitch" the refrigerator's highly sensitive main electronic control board. When the local power drops and violently returns in a fraction of a second, the massive inrush current can easily overwhelm the delicate microprocessors.
The Destructive Power Surge Sequence
Most modern refrigerator control boards feature a tiny, sacrificial component called a varistor. This component is specifically designed to absorb lethal voltage spikes. However, if the grid fluctuation is too massive, the varistor blows completely, and the board software locks up to protect the remaining circuits. If your fridge refuses to turn back on, the interior lights are completely dark, or the digital display panel is blinking erratically and unresponsive after a neighborhood blackout, a physical hard reset is almost always required. You must completely sever the power to clear the volatile RAM memory and force the operating system to completely reboot.
The Freon Pressure Equalization Phase
Many modern smart refrigerators (especially from elite brands like Samsung and LG) are explicitly programmed with a specific "safety lockout" delay. When grid power is successfully restored, the computer intentionally prevents the compressor from turning on for exactly 10 to 15 minutes. This brilliant engineering feature prevents the compressor from trying to instantly start against a wall of highly pressurized, liquid Freon. If the motor attempts to start while the high-side "head pressure" and the low-side "suction pressure" are still completely unbalanced, the heavy piston will physically stall. It will aggressively draw locked-rotor amperage and violently overheat the motor windings.
Bypassing Showroom and Demo Modes
Furthermore, many homeowners aggressively panic during this 10-minute lockout window, incorrectly assuming the severe storm killed the fridge. Occasionally, the power surge will scramble the computer logic so badly that the fridge automatically reboots into "Showroom Mode" (also known as Demo Mode). In this frustrating state, the interior lights shine brightly, and the display buttons beep normally, but the cooling compressor is digitally locked out. Knowing how to perform a proper hard reset—which involves safely unplugging the unit, fully discharging the internal capacitors, waiting the mandatory equalization period, and entering the specific keypad combination to exit Demo Mode—is absolutely crucial to rescuing your food.
4. Understanding Refrigerator Error Codes and How to Fix Them
In the distant past, when a refrigerator quietly stopped cooling, a repair technician had to spend hours manually testing every single individual component with a multimeter just to find the single broken part. Today, when your highly intelligent appliance actively detects a specific component failure—like a bad thermistor temperature sensor reporting physically impossible data, an overheating main circuit board, or a physically stalled evaporator fan motor—it will immediately flash a specific, alphanumeric error code directly on the front digital display panel to aggressively warn you.
Entering Factory Diagnostic Mode
These specific codes (such as LG's notorious ER IF indicating an ice maker fan failure, or Electrolux's SY EF indicating an evaporator fan circuit issue) are essentially the smart refrigerator actively telling you exactly where it hurts. However, simply knowing the specific code is rarely enough to complete the repair. Professional technicians routinely use secret button combinations to enter the appliance's hidden "Diagnostic Mode." Once inside this mode, you can actively force the refrigerator to turn on the defrost heater, test the ice maker motor, or spin the condenser fan on demand. This allows you to definitively verify if the component listed in the error code is genuinely dead, or if the main control board is simply sending faulty commands.
Communication Harness Failures
Accurately translating these cryptic manufacturer codes into highly actionable diagnostic steps is vital. For example, you might see an error code indicating a "Communication Failure" between the main back board and the front display panel. Many DIYers mistakenly purchase two brand new, highly expensive circuit boards. Instead, the actual, frequent failure is the thick wiring harness that routes directly through the hollow top door hinge. Over ten years of opening and closing that heavy door several times a day, the delicate copper wires simply snap in half from metal fatigue. Identifying these specific physical failure points saves you massive amounts of time and money.
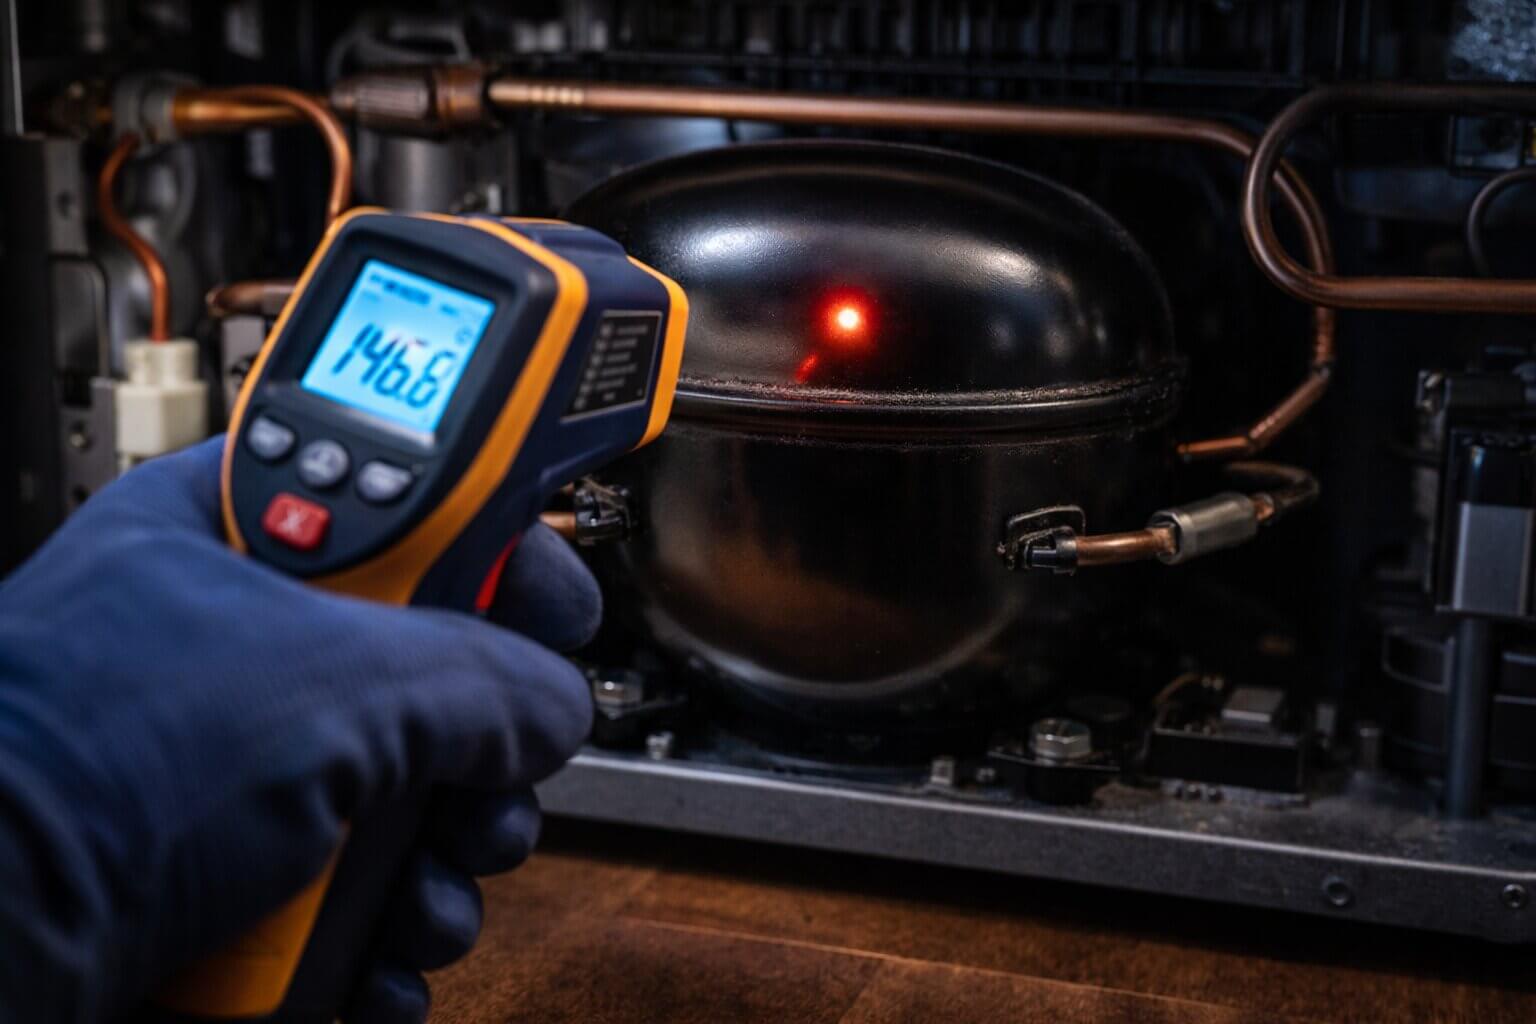
The fundamental physical laws of thermodynamics strictly dictate that when you rapidly compress a gas into a high-pressure liquid, it generates a massive amount of physical heat. Because of this necessary process, the heavy black compressor tank sitting at the bottom rear of your appliance will naturally always be quite warm to the touch while it is actively running. However, a compressor that is absolutely scorching, blistering hot to the touch (to the point where you cannot keep your bare hand on the steel shell for more than three seconds) and rapidly clicking on and off is in critical danger.
The Impact of Ambient Room Temperature
To safely determine the true severity of the motor's operating conditions, professional technicians heavily rely on an infrared digital thermometer gun. By aiming the red laser pointer precisely at the center casing of the compressor shell, you can achieve an instantaneous, highly accurate surface reading without ever risking a painful thermal burn. A perfectly healthy compressor generally operates comfortably between 100°F and 130°F. However, if you keep your refrigerator in an uninsulated, sweltering summer garage, the ambient room temperature aggressively forces the compressor to run far hotter than intended. If your digital gun registers an extreme surface temperature exceeding 165°F (73°C), the internal thermal overload switch will violently snap open to kill the power and prevent a total meltdown.
Condenser Fan Motor Diagnostics
This intense overheating is almost always directly caused by an entirely suffocated condenser system. The small condenser fan motor sits right next to the compressor. Its sole job is to aggressively pull cool room air over the hot compressor casing and forcefully push it through the intricate steel condenser coils. If the rear condenser fan motor completely dies, or if the intricate steel coils are tightly covered in a thick, insulating blanket of pet hair and oily kitchen dust, the massive generated heat has absolutely nowhere to escape. The heavy compressor essentially bakes itself alive in its own generated thermal energy. You must immediately unplug the appliance, safely pull it away from the wall, and meticulously vacuum the coils clean to restore vital airflow.
6. How to Test Refrigerator Capacitor with Multimeter
Working directly alongside the start relay on the side of the heavy compressor, the run capacitor is a small, cylindrical device that acts essentially like a temporary, high-voltage battery. While the start relay gives the compressor the initial, massive punch to wake up from a dead stop, the run capacitor continuously stores and rapidly releases voltage to safely shift the electrical phase angle. Consequently, this continuous smoothing action helps the heavy motor maintain a steady, highly efficient rotational speed during its long, arduous cooling cycles.
The Dangers of Internal Electrolytic Failure
Because these specific capacitors are constantly storing and aggressively dumping high voltages thousands of times a day, they are highly susceptible to degrading over time. The internal electrolytic chemical fluid often slowly dries out, drastically reducing the part's ability to hold a strong charge. Alternatively, they can fail violently during sudden power grid spikes. A failing capacitor will often visibly bulge at the flat top, leak a thick, sticky dielectric fluid down its sides, or simply die entirely without any external visual signs. When the run capacitor fails, the compressor instantly loses its rotational efficiency. It is aggressively forced to draw significantly more running amperage to do the exact same amount of cooling work. This massive increase in electrical current causes the compressor to overheat aggressively, run incredibly loudly, and eventually stall completely.
Understanding Microfarad Ratings
Testing a capacitor requires a highly specific digital multimeter equipped with a "Capacitance" (measured strictly in microfarads, or µF) setting. Simply checking for continuity will not definitively tell you if the device can actually hold a working charge under a heavy electrical load. Before ever connecting your delicate digital multimeter probes to the two exposed metal terminals of the run capacitor, you must absolutely execute a strict safety discharge procedure. A healthy capacitor can still secretly retain a massive, highly painful shock of stored 120-volt energy.
Therefore, to properly and safely discharge this stored electricity, you must take a heavy-duty screwdriver with a thick, completely insulated rubber handle and deliberately touch the bare metal shaft across both exposed metal capacitor terminals simultaneously. Once safely discharged, switch your multimeter dial to the specific 'µF' setting. A standard domestic refrigerator run capacitor will typically display a factory rating printed directly on its side label—usually between 12µF and 15µF. If your precise digital reading drops below 10% of that strictly printed specification (for example, reading a highly weak 8µF on a 15µF rated capacitor), the internal electrolytic plates have critically degraded. The capacitor is completely dead and must be replaced immediately to safely save the compressor.
7. How to Install a Hard Start Kit on an LG or Kenmore Fridge
As standard refrigerators age gracefully past the 10-year mark, the internal mechanical components of the heavy compressor (the pistons, the tiny valves, and the spinning crankshaft) inevitably begin to physically wear down. The specialized lubricating oil trapped inside the sealed steel shell becomes thick and sludgy over time, and the tight mechanical tolerances become even tighter. Eventually, the heavy motor becomes mechanically "sticky."
Locked Rotor Amps (LRA) Explained
When this stickiness occurs, the compressor requires significantly more instantaneous rotational torque to get moving than the tiny, factory-installed original start relay and run capacitor can possibly provide. The motor enters a state called Locked Rotor Amps (LRA), pulling massive current from the wall while failing to move the piston. Even if you diligently install a brand new OEM factory relay, the aging compressor simply refuses to start, resulting in the highly dreaded, endless clicking cycle that ruins your food.
Vibration Management During Installation
Before you completely condemn the appliance and pay $1,200 for a completely new sealed compressor system, there is one final, highly effective professional "hail mary" trick: The 3-in-1 Hard Start Kit. A hard start kit is a massive, highly powerful aftermarket capacitor and solid-state relay combination device packaged into one single pre-wired unit. It completely bypasses the weak factory electrical components and actively delivers a massive, targeted boost of starting torque (often providing up to 500% more power) directly to the compressor terminal pins.
This intense surge of raw electrical energy is often exactly enough to violently kickstart a deeply stubborn, locked-rotor compressor, successfully breaking it free from its sludgy friction and getting it running perfectly again. However, because this aftermarket kit is physically heavy, you must utilize heavy-duty zip ties to securely mount it to the metal frame of the fridge. If you simply let it dangle by its wires, the intense daily vibration of the running compressor will quickly chafe the wires bare and create a severe fire hazard. A properly mounted $15 hard start kit can easily extend the life of an older, dying appliance by several valuable years.
Crucial Warning: Hard start kits are strictly designed exclusively for older, traditional single-speed compressors. You must NEVER install a 3-in-1 hard start kit on a modern, variable-speed "Inverter" compressor (commonly found in almost all modern LG, Samsung, and high-end GE profiles). Sending a massive 500% voltage spike directly into a highly delicate inverter compressor will instantly and violently destroy the motor windings and permanently fry the highly expensive computer inverter control board.
8. Preventative Electrical Maintenance for Refrigerators
Most homeowners completely ignore their heavy refrigerator until the exact moment it stops cooling and their expensive food begins to aggressively spoil. However, treating your massive kitchen appliance with the exact same preventative care you give your automobile will undeniably double its reliable lifespan and save you thousands of dollars in emergency repair bills. Preventative electrical maintenance actively reduces the daily mechanical strain placed directly on the compressor and the delicate control boards.
Installing Dedicated Appliance Surge Protectors
As previously established, modern refrigerators operate as highly sophisticated, incredibly fragile computers. You would absolutely never plug a $2,000 gaming computer or a massive OLED television directly into a raw wall outlet without a high-quality surge protector. Therefore, you must apply this exact same strict logic to your kitchen appliances. Because standard whole-house surge protection frequently fails to stop rapid micro-fluctuations in the municipal grid, you must proactively purchase a heavy-duty, single-outlet appliance surge protector. These specific, high-joule devices actively sacrifice themselves during a sudden lightning strike, definitively ensuring that the incredibly expensive main electronic control board resting inside your fridge never receives the lethal voltage spike.
Routine Coil Vacuuming
Furthermore, electrical components fail significantly faster when exposed to extreme, prolonged heat. The absolute best way to lower the electrical amperage draw of your massive compressor is to ensure it breathes perfectly clean air. You must establish a strict routine of pulling the heavy refrigerator away from the kitchen wall at least twice a year. Next, utilize a professional, flexible coil brush and a strong shop vacuum to aggressively remove every single trace of pet hair, dense dust bunnies, and sticky cooking grease from the intricate lower condenser coils.
Finally, always ensure you leave an absolute minimum of one inch of clear physical space between the back of the refrigerator and the drywall. This critical gap actively guarantees the rear condenser fan can properly exhaust the massive heat load directly into the room. By proactively implementing these highly simple, incredibly cheap preventative measures, you actively protect your vital electrical components from premature thermal death.
9. Frequently Asked Questions (FAQ)
Can a power surge completely ruin a refrigerator?
Absolutely. Severe power surges from lightning strikes, downed power lines, or municipal grid failures can easily overwhelm the internal surge protection and permanently fry the highly sensitive microchips located on the refrigerator's main electronic control board. The massive voltage spike can also instantly shatter the compressor's PTC start relay or blow the varistor on the power supply board, preventing the appliance from cooling entirely until the damaged printed circuit boards are replaced.
How much does it typically cost to replace a completely dead refrigerator compressor?
Replacing a dead compressor is universally the single most expensive and labor-intensive repair in the refrigeration industry. Because it strictly requires a licensed, EPA-certified professional to safely recover the chemical Freon, physically weld new copper lines with a brazing torch, and pull a deep, hours-long vacuum on the sealed system to remove moisture, the total cost including parts and heavy labor typically ranges from $800 to over $1,400. This massive cost is exactly why testing the inexpensive start relay first is so absolutely critical.
Why does my refrigerator click loudly and then visibly dim the kitchen lights?
When a heavy refrigerator compressor mechanically locks up (known as a locked-rotor state), it desperately tries to draw an enormous, abnormal amount of starting amperage from your home's electrical panel to force the piston to move. This massive, sudden power draw can temporarily starve the rest of the shared electrical circuit, causing your overhead kitchen lights to visibly dim or flicker right before the compressor's thermal overload switch violently clicks open and shuts the motor down to prevent the wiring from melting and starting a fire.
Is it safe to test refrigerator electrical components while it is plugged in?
Generally, no. For 95% of DIY diagnostics, including testing continuity on a start relay, checking the resistance of a glass defrost heater, or looking for a shattered capacitor, the appliance MUST be completely unplugged from the wall. The only time a professional technician tests a live machine is to check for incoming voltage at the main control board, which requires advanced training, proper insulated Class 0 electrical gloves, and an extreme understanding of AC vs DC pathways. For homeowners, always unplug the machine before removing any steel panels.
About the Author: Alex Bennett
Alex Bennett is an elite appliance repair specialist with over 10 years of highly technical, hands-on experience diagnosing and successfully repairing complex residential refrigerator cooling systems, sealed system Freon leaks, and intricate electrical control board failures. He has worked extensively with advanced inverter compressor failures, delicate evaporator fan motors, complex thermostat sensor malfunctions, physical airflow restrictions, and highly dangerous electrical shorts.
Through his work at Fridge Mentor, Alex leverages his massive database of field knowledge to help homeowners clearly understand their refrigerator's complex temperature problems, troubleshoot safely without risking electrical shock, and accurately determine exactly when expensive professional repair is absolutely necessary versus when a fast, cheap DIY fix is possible. His ultimate goal is to provide incredibly clear, deeply practical guidance backed by thousands of hours of real-world repair experience.