

Finding a large puddle of water under your vegetable crisper is a homeowner’s nightmare. This water can quickly warp expensive hardwood floors. You might immediately assume a pressurized internal pipe burst. You might think the entire appliance is ruined.
💡 Mentor’s Fast Advice
Does your leaking refrigerator also suffer from severe cooling issues or massive frost buildup? If so, you face a bigger problem. A dead compressor points to a complete system failure. Check out our main troubleshooting hub for a masterclass on major hardware diagnostics.
Fortunately, most residential refrigerator leaks have nothing to do with catastrophic plumbing failures. Simple blockages, loose fittings, or condensation issues cause most leaks. You can easily fix these problems with basic household tools. In this guide, we will walk you step-by-step through locating the exact water source. Then, we will show you how to stop the leak permanently.
⚠️ Safety Warning:Always physically unplug your refrigerator from the wall outlet. Completely shut off the copper home water supply valve. Do this before you remove any back panels or unthread water lines.
1. Identify the Source of the Leak
Before you take things apart, you must play detective. Water always travels the path of least resistance. Finding where the puddle forms helps you identify the broken component. Check inside, underneath, and directly behind the refrigerator.
- Water pooling INSIDE under the deli drawers: A frozen or clogged defrost drain tube usually causes this.
- Water pooling directly BEHIND the fridge: This points to a leaking plastic water line, a cracked inlet valve, or a broken filter housing.
- Water leaking from the FRONT corners onto the floor: This indicates an overflowing evaporation drip pan. A fridge tilting too far forward can also cause this.
2. Clear a Clogged Defrost Drain (The #1 Cause)
Every modern “frost-free” refrigerator melts frost off its internal coils multiple times a day. This melted water drops directly into a small aluminum V-shaped gutter. It then runs down a tiny plastic drain tube into a bottom pan. There, the water safely evaporates.
The Problem: Over a few years, food crumbs, spilled syrup, and bacteria heavily clog this tiny drain tube. When the tube clogs, the daily defrost water violently overflows the gutter. It runs directly under your deli drawers and leaks out the front door.
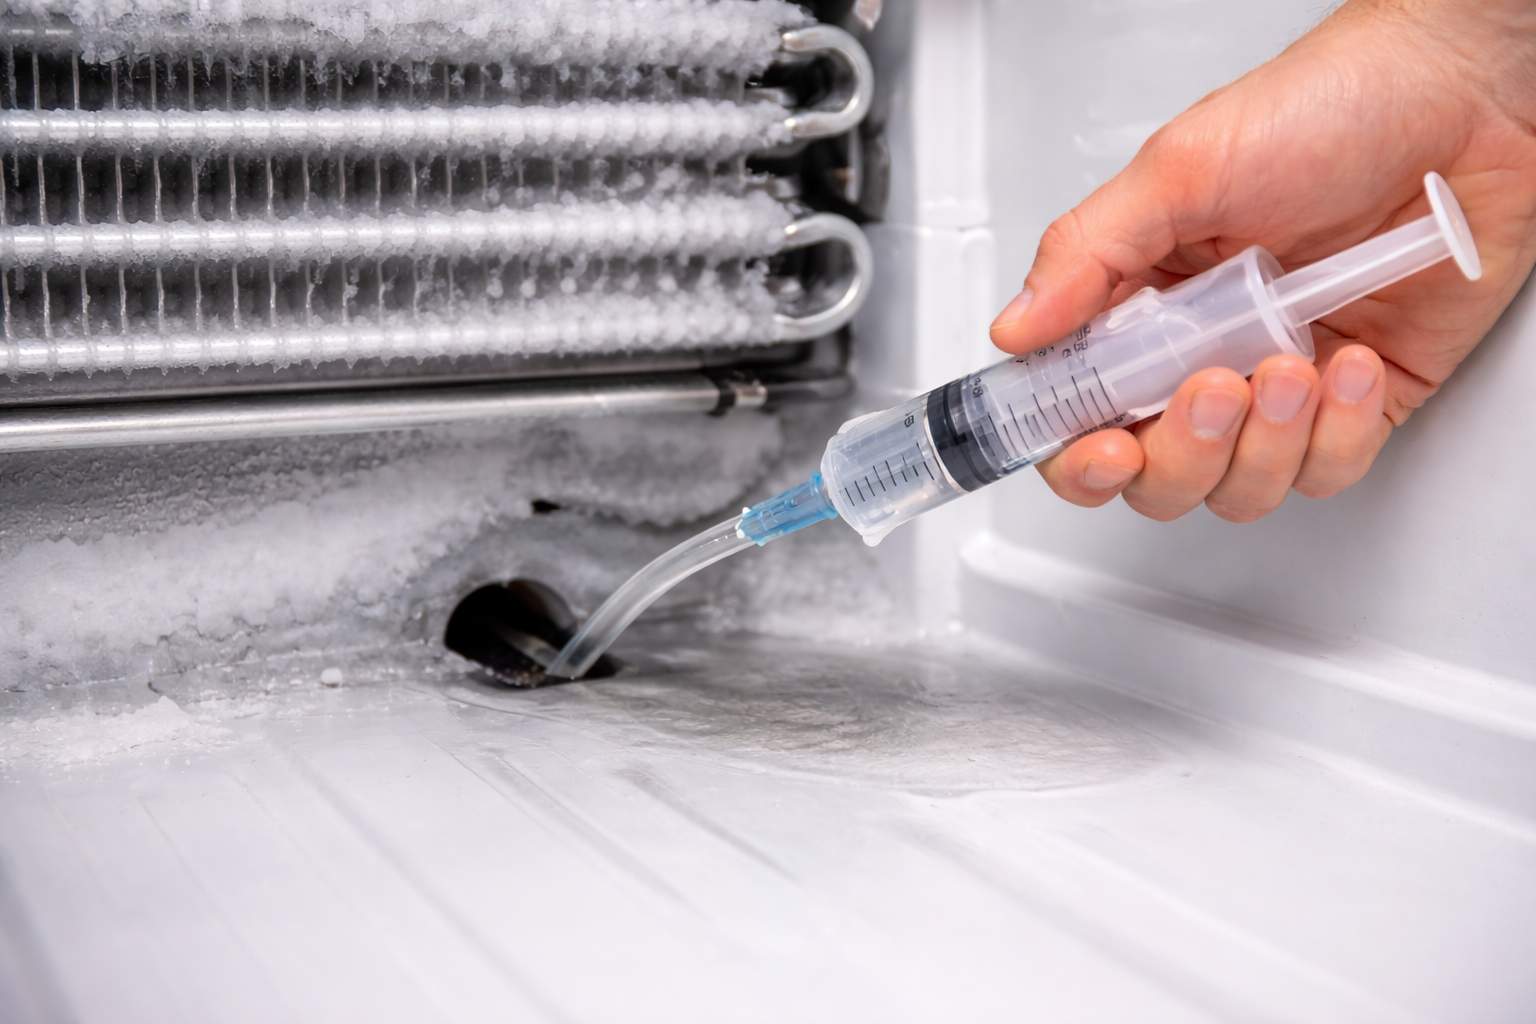
The Fix: Unplug the fridge and access the back wall of the freezer compartment. Locate the small drain hole directly under the silver evaporator coils. If solid ice blocks it, use a hairdryer on medium heat to melt the ice. Once you expose the hole, you must forcefully flush it out. We highly recommend using a specialized defrost drain cleaning syringe filled with hot water and baking soda. Inject the hot water directly into the drain. This aggressively pushes the organic clog completely out into the bottom pan. Your leak will instantly stop.
3. Inspect and Tighten Water Supply Lines
Does your refrigerator feature an automatic ice maker or a front door water dispenser? If so, a physical pipe connects it to your home’s water supply. The plastic and copper connections at the back endure constant, intense municipal water pressure.
The Problem: Over time, cheap plastic tubing becomes highly brittle and develops microscopic cracks. Furthermore, the compression nuts connecting the hose to the dual water inlet valve can vibrate loose. Do you notice heavy frost or clumping in the ice bucket instead of a floor puddle? You might have a different issue entirely. For that, check out our dedicated guide on how to fix a Samsung ice maker that is freezing up and clumping.
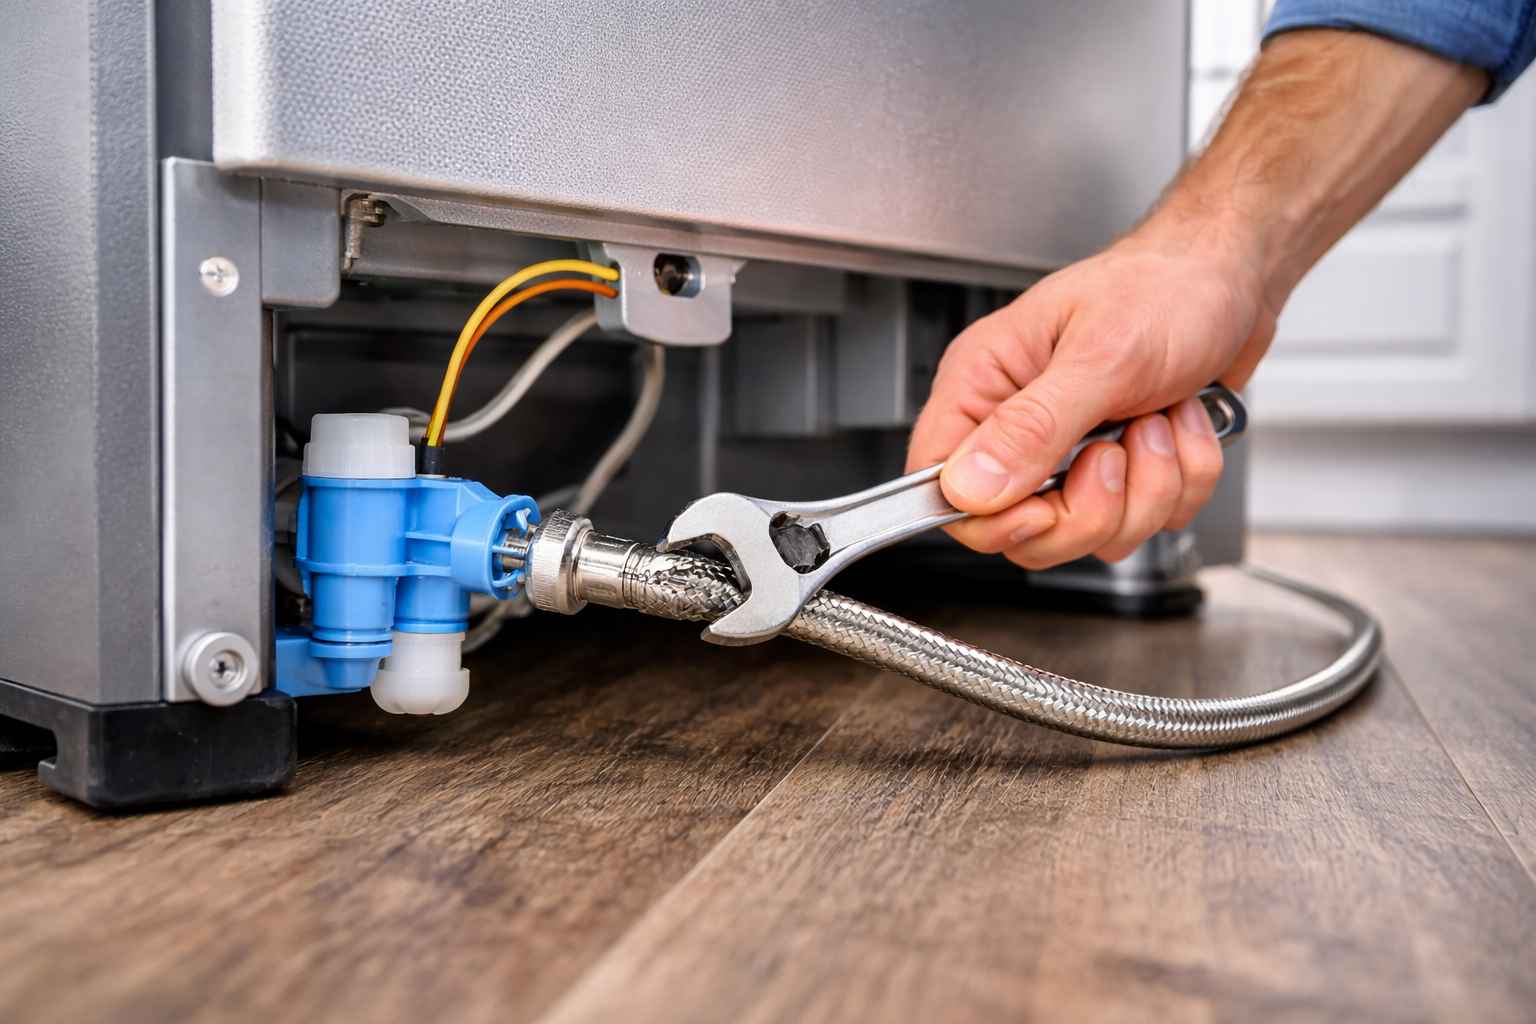
The Fix: Pull the refrigerator firmly away from the wall. Inspect the entire length of the water line. Run a dry paper towel along the hose. If it comes away wet, you have a pinhole leak. Use a crescent wrench to firmly tighten the compression nuts at the wall valve and the refrigerator inlet valve. If your fridge uses cheap plastic tubing, do yourself a massive favor. Upgrade to a heavy-duty braided steel water line. They are virtually burst-proof and will save your kitchen floors.
4. Clean and Inspect the Drip Pan
The defrost drain tube empties into a shallow tray at the absolute bottom of the refrigerator. We call this the evaporation drip pan. It sits right next to the hot compressor. The intense heat from the compressor naturally evaporates the collected water back into the room.
The Problem: A cracked pan will leak water directly onto your floor. A thick layer of insulating dust can prevent evaporation. Sometimes, the pan misaligns, and the drain tube misses it entirely.
The Fix: Remove the front bottom kickplate grille and shine a flashlight underneath the fridge. Carefully slide the drip pan out if your model allows it. Inspect it for severe cracks. Wash it thoroughly with warm soapy water. This removes mold and dust, which can act as a sponge and stop evaporation. Ensure you seat it perfectly level during reinstallation.
5. Check the Door Seals (Gaskets)
You might be surprised to learn that a bad door seal can cause a leak. We call the heavy rubber magnetic seals around the doors gaskets.
The Problem: A physically torn or dried-out gasket fails to seal the door. Warm, highly humid kitchen air constantly seeps into the freezing appliance. This massive influx of humidity instantly condenses into heavy water droplets. These droplets coat the interior walls and ceiling. This excess condensation eventually overwhelms the defrost drain system and leads to interior pooling.
The Fix: Inspect the rubber seals for visible cracks or gaps. Close a crisp dollar bill in the door and pull it out. If you feel zero friction, the seal is failing. Aggressively clean the seals with warm soapy water. Next, massage a thin layer of food-grade silicone grease into the rubber. This rejuvenates its flexibility and restores the magnetic grip. You must replace completely torn gaskets.
6. Adjust the Refrigerator Level
Engineers purposefully design refrigerators to sit at a very specific angle to manage water flow. The unit should sit perfectly level from left to right. However, it should tilt slightly backwards. Make the front about a quarter of an inch higher than the back.
The Problem: A refrigerator tilting forward causes the defrost water to physically miss the rear drain hole. Alternatively, the bottom drip pan slants forward and violently spills water onto the floor.
The Fix: Place a standard bubble level on top of the fridge. Use a wrench to adjust the hexagonal front leveling legs behind the bottom grille. Raise the front legs until the horizontal bubble sits perfectly center. Verify the fridge leans just slightly back. This also helps your heavy doors naturally swing shut on their own!
Conclusion
Discovering a puddle of water around your refrigerator does not mean you need a new appliance. First, methodically identify the source of the leak. Then, execute these simple DIY fixes. Flush the defrost drain, upgrade to braided steel lines, and level the chassis. You can easily save hundreds of dollars in professional repair bills. After performing your repairs, monitor the area closely with a dry paper towel for 48 hours. This confirms the system remains watertight.


