

Is your freezer turning into an igloo? If you see a thick layer of frost coating the back wall of your freezer, or if your fridge section is warm while the freezer is icy, you likely have a defrost system failure. It is one of the most common refrigerator breakdowns, but it is also one of the easiest to fix. Today, we will show you exactly how to test refrigerator defrost heater components to melt away your cooling problems.
The defrost heater is essentially the radiator of your refrigerator. Once or twice a day, it turns on to melt any frost that has accumulated on the evaporator coils. If it burns out, that frost keeps building until it blocks the airflow completely, suffocating your appliance.
Understanding the mechanics of auto-defrost systems can save you hundreds of dollars in food waste. When the heater fails, the cooling system works overtime, eventually freezing up the entire unit.
In this comprehensive guide, we will help you identify bad defrost heater symptoms, locate the part in various fridge models, and walk you through how to test refrigerator defrost heater wiring with multimeter probes to confirm if it needs replacing.
Understanding the Cycle Before Learning How to Test Refrigerator Defrost Heater
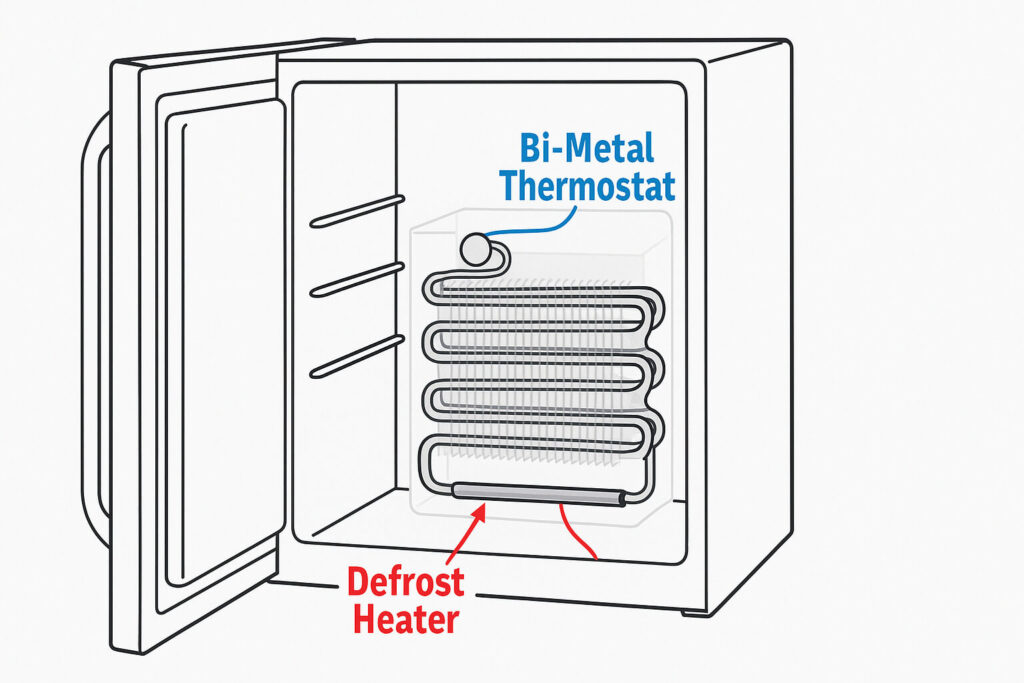
To understand why a bad heater causes such chaos, you need to know how your fridge stays frost-free. In the old days, you had to manually defrost freezers by unplugging them. Modern fridges do this automatically using a three-part system:
- The Timer/Control Board: Tells the system “It’s time to melt the ice” (usually every 8-10 hours).
- The Defrost Heater: Turns on and gets hot (up to 300°F or more) to melt the ice on the coils.
- The Defrost Thermostat (Termination Switch): Senses when the ice is melted and turns the heater off to prevent overheating.
If the heater fails, the timer still tells it to turn on, but nothing happens. The frost from the cooling cycle accumulates layer by layer until it forms a solid block of ice, blocking the air vents.
Common Bad Defrost Heater Symptoms
Before you grab your toolbox, you need to confirm that the heater is the likely culprit. Unlike a bad compressor (which is usually silent or clicking), a bad heater leaves clear visual and physical evidence.
1. The “Snow Wall”
The most obvious sign is visual. Look at the back panel of your freezer. Do you see frost forming on the plastic or metal wall? If you remove that panel and see the silver coils completely encased in a block of white ice or snow, your defrost system is dead.
2. Warm Fridge, Cold Freezer
This is the classic airflow symptom. The evaporator fan pulls cold air through those coils to send it to the fridge section. If the coils are blocked by ice, the fan cannot pull any air. Your freezer might stay at 0°F (because the coils are still cold), but your fresh food section will rise to 50°F or 60°F.
3. The “Hissing” Sound is Gone
Normally, during a defrost cycle, you might hear a hissing or sizzling sound (like water dripping on a hot pan). This is the melting ice dripping onto the hot heater. If you haven’t heard that sound in weeks, your heater might be burnt out.
Refrigerator Defrost Heater Location: Where is it?
To learn how to test refrigerator defrost heater units, you first need to find them. They are always located in the freezer compartment, attached to the evaporator coils. However, access varies by fridge style.
Top Mount Freezers (Freezer on Top)
These are the easiest to work on. The heater is located behind the back wall of the freezer. You will need to remove the wire shelf and unscrew the back panel.
Side-by-Side Models
The heater is located on the lower back wall of the freezer side. Access can be tight because the freezer compartment is narrow. You typically need to remove the ice bucket and lower baskets.
French Door / Bottom Freezer
These are the hardest to access. The heater is on the back wall of the bottom drawer. You must remove the freezer drawer front, the sliding baskets, and the ice maker assembly to get to the back panel.
Step 1: Preparation and Safety
Working on a defrost system involves electricity, water, and sharp metal. Follow these safety steps:
- Unplug the Unit: Never test resistance on a live appliance. Unplug the fridge from the wall.
- Protect Your Floor: As the ice melts, water will leak. Place heavy towels on the floor.
- Defrost Manually: If the coils are a solid block of ice, you cannot test the heater yet. Use a hair dryer (on low heat) or a steam cleaner to melt the ice. Do not use a heat gun on high, as you can warp the plastic liner!
Step 2: Identifying Your Heater Type When Learning How to Test Refrigerator Defrost Heater
Once the panel is off and the ice is melted, you will see the heater element running along the bottom and sides of the silver coils. There are three common types:
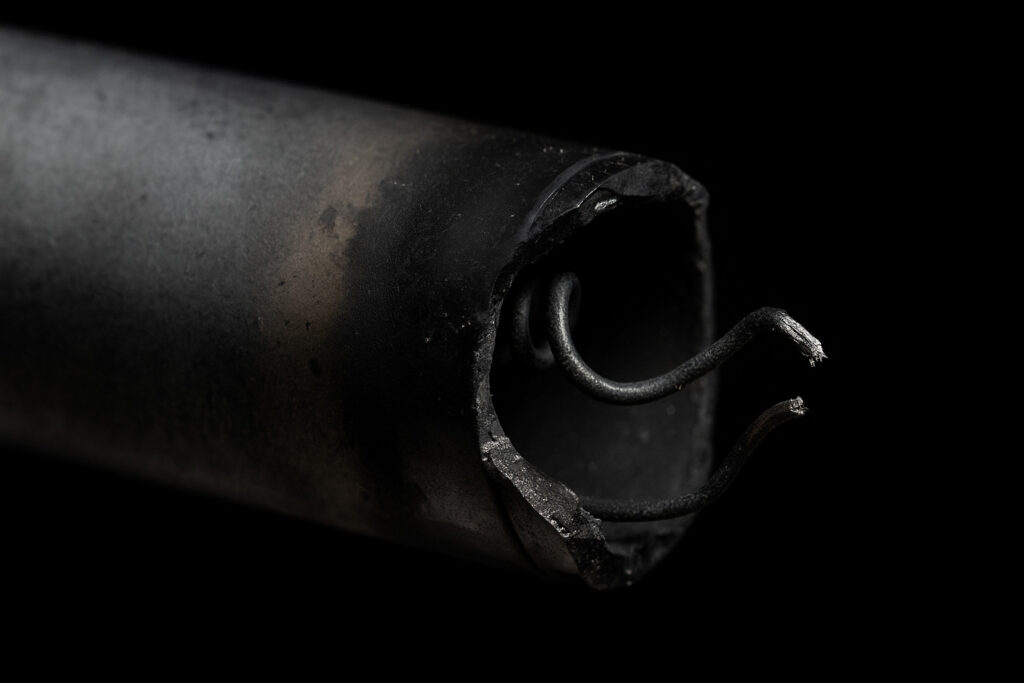
Glass Tube Heaters (Common in GE, Whirlpool, Amana)
These look like a black or clear glass fluorescent light bulb.
Visual Check: Look closely at the glass. If it is shattered, cracked, or looks black and sooty inside, it is definitely bad. You don’t need to test it; just replace it.
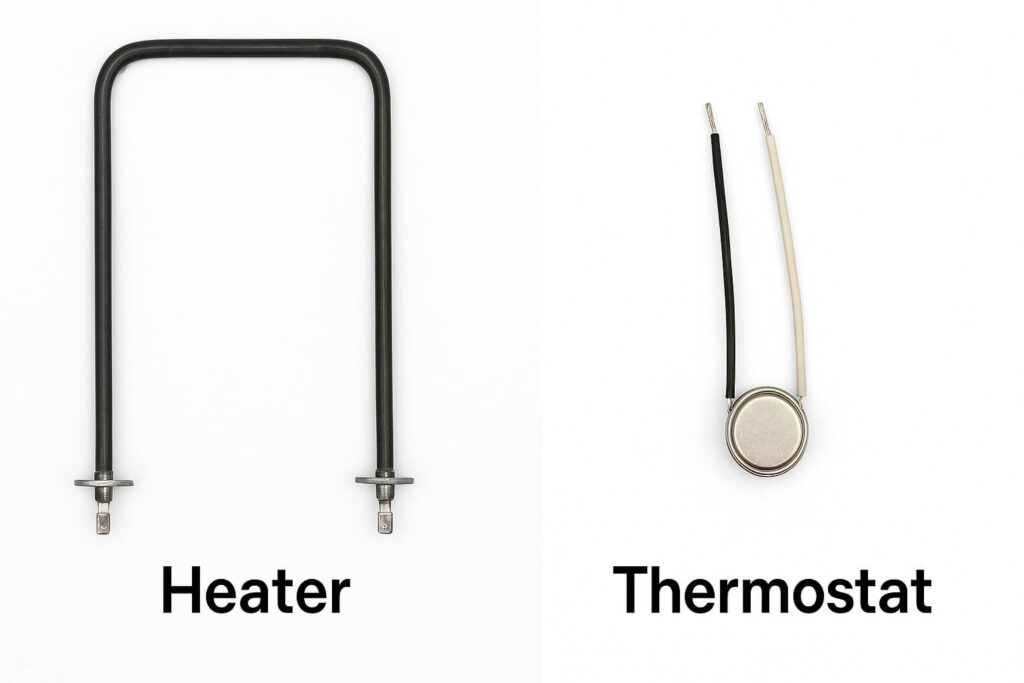
Calrod / Metal Loop Heaters (Common in Samsung, LG, Frigidaire)
These look like the heating element in your oven—a black or dark grey metal tube bent into a U-shape.
Visual Check: These rarely show physical damage unless they are split open. You must use a multimeter to test these.
Step 3: Guide on How to Test Refrigerator Defrost Heater with Multimeter
If the heater looks physically okay, an electrical continuity test is the only way to be sure. Here is the specific process for how to test refrigerator defrost heater assemblies using standard tools.
1. Set Your Multimeter
Turn your digital multimeter dial to the lowest Ohms (Ω) of resistance setting. This is usually the 200Ω setting. (If your meter has a “Tone” or continuity beep setting, you can use that too).
2. Isolate the Circuit
Crucial Step: You cannot test the heater while it is connected to the fridge. Trace the two wires coming from the heater ends. They will lead to a plug or wire harness. Unplug the harness. If the wires are hard-wired, you may need to disconnect one side.
3. Touch the Probes
Take your red probe and touch it to one metal terminal in the heater’s plug. Take the black probe and touch it to the other terminal. It does not matter which probe goes to which side.
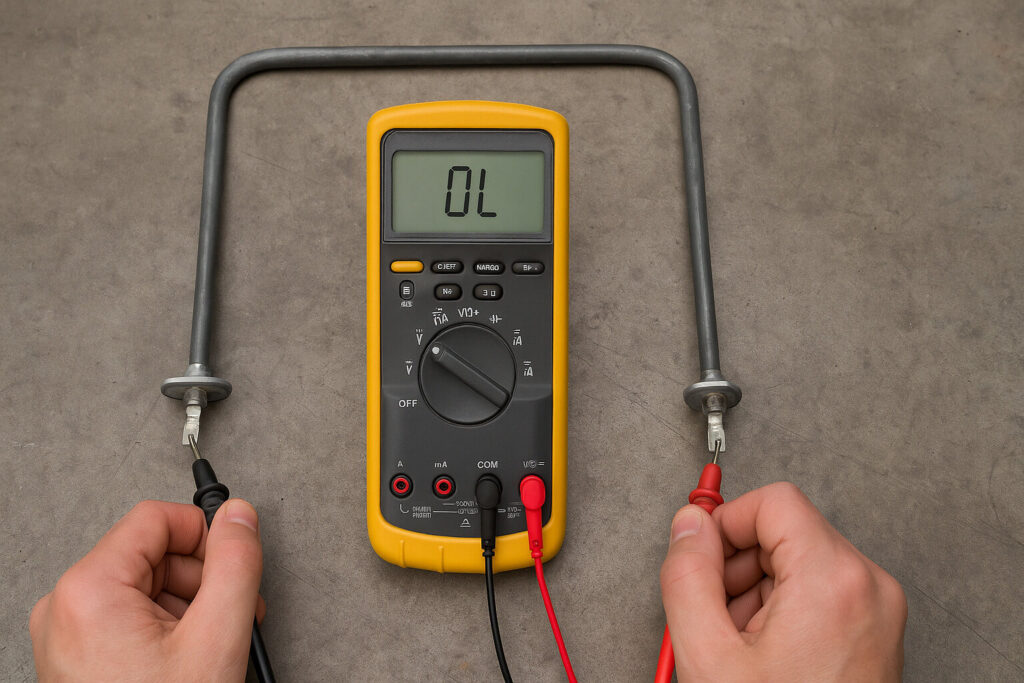
4. Read the Results
Now, look at your multimeter screen to determine if you have a bad defrost heater:
- The “Good” Reading (Continuity): You want to see a number between 10Ω and 150Ω.
- Most glass tube heaters read between 20Ω and 50Ω.
- Larger Calrod heaters might read up to 100Ω.
- If you get a number in this range, your heater is GOOD. The problem is not the heater.
- The “Bad” Reading (Open Circuit): You see “OL” (Open Loop) or a solid “1” (Infinite).
- This means the wire inside the heater is broken. Electricity cannot flow. Your heater is DEAD and must be replaced.
Check Prices for Replacement Defrost Heaters on Amazon
Step 4: Troubleshooting Other Components (If Heater is Good)
You followed our guide on how to test refrigerator defrost heater wiring, and your multimeter showed a perfect 30Ω reading. But your fridge is still freezing up. What now?
The defrost system is a chain. If the heater is fine, one of the other links in the chain is broken.
The Defrost Thermostat (Bi-Metal)
This is a small round metal cylinder (about the size of a marshmallow) clipped onto the top of the evaporator coils. Its job is to cut power to the heater if it gets too hot. Often, these get stuck “open,” preventing the heater from ever turning on.
Test: While the thermostat is still cold (frozen), check it for continuity. It should be “Closed” (0Ω) when freezing and “Open” (OL) when warm (above 40°F). If it reads OL while sitting in ice, the thermostat is bad.
FAQ: Questions on How to Test Refrigerator Defrost Heater
How much does a defrost heater replacement cost?
If you DIY, the part typically costs between $25 and $80. If you hire a professional appliance repair technician, the total cost will likely be between $200 and $350.
Can I replace just the glass tube or do I need the whole assembly?
It is highly recommended to buy the full assembly (heater + bracket + harness). Trying to restring a glass tube into an old bracket is difficult and increases the risk of breaking the new glass.
Why does my Samsung fridge keep freezing up even after a new heater?
Samsung refrigerators are notorious for a specific issue: the defrost drain clip. The heater works, but the drain hole freezes over, causing water to back up and turn into ice. You may need to install an upgraded “extended” drain clip that reaches deeper into the drain hole.
Conclusion
Diagnosing a frozen fridge can feel overwhelming, but breaking it down into steps makes it manageable. By learning how to test refrigerator defrost heater components, you are performing the exact same diagnostic steps a pro charges $100 just to show up for.
If your heater tests bad (OL), replacing it is a straightforward swap that will get your fridge running efficiently for years to come. If it tests good, move your attention to the bi-metal thermostat.
Now that your defrost system is clear, is your fan running loudly? Check out our next guide on how to test evaporator fan motor to silence that noisy fridge.


