

Is your refrigerator sounding like a helicopter ready for takeoff, or is the freezer freezing cold while the fresh food section is dangerously warm? Learning how to test evaporator fan motor components is the fastest, most effective way to diagnose these sudden cooling failures and save hundreds of dollars in spoiled groceries.
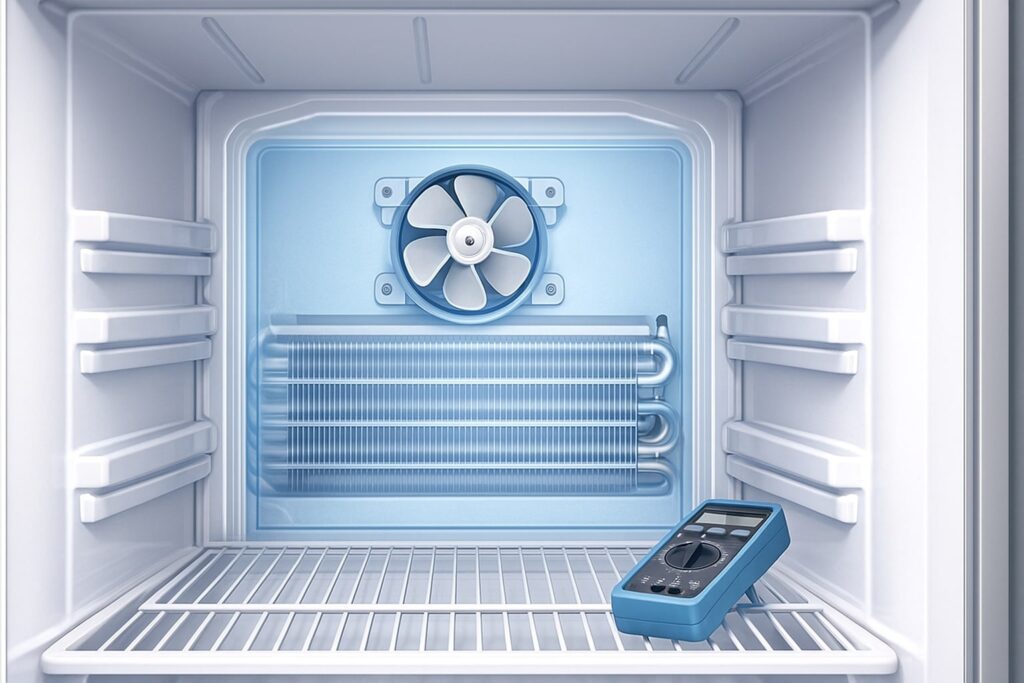
The internal evaporator fan is truly the unsung hero of your kitchen appliance. While the heavy mechanical compressor acts as the engine to create the cold, the fan acts as the delivery system. It sits hidden in the freezer behind the back plastic wall, pulling air over the freezing-cold coils and aggressively pushing it up through an air damper into the fresh food compartment.
If this fan fails, the vital airflow stops completely. This results in a freezer that drops to a bitter -10°F because the cold air is trapped, and a fridge that slowly climbs to a balmy, unsafe 50°F. According to the Department of Energy, maintaining proper unobstructed airflow is also critical for your appliance’s overall energy efficiency and lifespan.
In this comprehensive, step-by-step DIY guide, we will break down the most common bad evaporator fan motor symptoms, help you diagnose the source of that dreaded refrigerator evaporator fan noise, and show you exactly how to test the motor using a digital multimeter safely.
💡 Mentor’s Diagnostic Hub
Dealing with multiple cooling issues? This specific fix is part of our comprehensive master guide. Learn how to diagnose every part of your appliance’s sealed system and airflow.
Why Learning How to Test Evaporator Fan Motor is Critical
To understand why the evaporator fan is so critical, you need to understand how a modern refrigerator actually cools. Contrary to popular belief, most residential refrigerators do not produce any cold air natively in the fresh food fridge section. The thermodynamic cooling magic happens entirely within the sealed freezer compartment.
The aluminum evaporator coils (which get freezing cold as liquid refrigerant expands inside them) are located in the freezer. The evaporator fan motor acts as the “lungs” of the appliance, actively blowing air over these frosty coils and circulating that newly chilled air throughout the entire unit in a continuous loop. The warm air from the fridge is then sucked back down into the freezer to be re-cooled.
If this fan dies, the cold air is permanently stranded inside the freezer walls. As the fridge warms up, the main control board will mistakenly assume the entire appliance is hot. It will force the system into overdrive, resulting in a refrigerator running constantly to compensate for the lack of airflow. This places immense strain on your compressor and spikes your electricity bill.
3 Major Bad Evaporator Fan Motor Symptoms
Before you start unscrewing internal panels and ordering replacement parts, look (and listen) for these tell-tale signs of mechanical or electrical failure. Diagnosing based on specific symptoms can save you an hour of unnecessary disassembly and point you directly to the root cause.
1. The Dreaded Refrigerator Evaporator Fan Noise
Unusual noise is the number one indicator of an impending mechanical fan failure. However, not all noises mean the same thing. Listening closely to the pitch and rhythm can tell you exactly what is wrong inside the freezer housing:
- Squealing or Chirping: This high-pitched sound usually indicates that the factory lubrication inside the motor bearings has dried out from years of sub-zero operation. The motor is still spinning, but the metal-on-metal friction is causing it to overheat and fail slowly.
- Loud Buzzing or Vibrating: This aggressive hum often happens when the plastic fan blade is loose, cracked, or unbalanced on the metal shaft. It can also occur if severe frost has built up around the fan housing, causing the spinning blades to physically strike the ice (sounding much like a playing card stuck in bicycle spokes).
- Heavy Grinding: A deep, metallic grinding sound means the internal bearings are completely shattered, or the motor shaft has slipped out of alignment. Total failure is imminent.
2. The “Warm Fridge, Cold Freezer” Phenomenon
This is the classic airflow restriction symptom. If you open your fresh food door and your milk feels room temperature, but your ice cubes are rock solid, the sealed cooling system is working perfectly. The cold air just isn’t moving. If you place your hand over the supply air vents at the top of the fridge section and feel absolutely zero breeze, you are dealing with a textbook freezer cold but fridge warm scenario. The fan is the prime suspect.
3. No Ice Production
Even if your automated ice maker assembly works flawlessly, it relies entirely on sub-freezing air circulation to freeze the liquid water sitting in the mold. A dead fan means stagnant, layered air. The water in the mold might freeze eventually over several days, but it will take 3x longer than usual, resulting in a severe drop in daily ice production.
Pre-Check: The “Door Switch” Trick
Before grabbing your toolbox and pulling out the frozen peas, try this simple, non-invasive diagnostic test. Most modern refrigerators are designed to automatically turn off the evaporator fan the moment you open the door. This prevents the appliance from aggressively blowing all your precious cold air out into the warm kitchen.
- Open the freezer door wide.
- Locate the mechanical door switch (usually a small plastic plunger button located on the inner door frame).
- Press and firmly hold the switch down manually with your finger to trick the fridge into thinking the door is closed.
- Wait 10 to 30 seconds for the control board to engage the circuit.
- Listen and Feel: If you hear the motor hum to life and feel a strong rush of air blowing from the back panel, the electrical motor is working perfectly! If you hear a loud, terrible buzzing immediately upon pressing the switch, you have just confirmed the source of the refrigerator evaporator fan noise. If there is dead silence while the compressor below hums away, the motor is likely burnt out.
Step 1: Accessing the Unit to Test Evaporator Fan Motor
If the symptoms strongly point to the fan, it is time to perform a physical and electrical inspection. Warning: Always unplug your refrigerator from the wall outlet before removing any internal panels to avoid the risk of severe electric shock.
Tools You Will Need:
- Magnetic nut driver set (specifically 1/4 inch and 5/16 inch sizes)
- Phillips head screwdriver
- A digital multimeter (absolutely essential for the electrical continuity test)
- A thick towel (to catch melting ice and protect the plastic floor)
- A handheld hair dryer or garment steamer (only if the fan is frozen over in a block of ice)
Removing the Back Panel
The fan is almost universally located behind the rear plastic or metal wall of the freezer compartment.
- Clear the Area: Remove all frozen food, wire shelves, and plastic baskets from the freezer to give yourself working room. If you have a bulky ice maker mounted to the side wall, you may need to remove it first (it is usually held in place by 2 or 3 upper screws).
- Remove the Fasteners: Look for the screws holding the back panel (often called the evaporator cover) in place. In some luxury models, you may need to gently pop off small cosmetic plastic caps using a flathead screwdriver to reveal the screw heads hiding underneath.
- Expose the Coils: Gently pull the panel forward. You may need to angle it slightly to maneuver it out of the freezer box. Once removed, you will see the bare silver evaporator coils and the fan motor, which is usually mounted inside a metal or plastic bracket directly above the coils.
Step 2: Physical Check Before You Test Evaporator Fan Motor
Before pulling out your multimeter, perform a basic mechanical check on the condition of the fan assembly. Reach in and gently flick the plastic fan blade with your finger.
- Scenario A: The Blade is Stuck. If the blade is incredibly stiff, hard to turn, or offers significant gritty resistance, the internal bearings are completely seized. No electrical testing is needed here—the motor is mechanically destroyed. Solution: You must replace the motor assembly.
- Scenario B: The Blade Wobbles. If the blade spins but feels loose and wobbly on the metal shaft, the loud noise you heard was likely intense vibration hitting the plastic housing. Solution: Push the blade tighter onto the shaft, or replace the worn rubber mounting grommets.
- Scenario C: The Blade Spins Freely. If it spins buttery smooth and coasts to a silent stop, the mechanical parts are fine. The issue is electrical. You must now learn how to test evaporator fan motor electrical windings to see if it has burnt out from the inside.
Note: If you remove the panel and find the fan encased in a solid block of ice, your fan might be fine, but your automated defrost system has failed. If the ice melts and the fridge works normally for a week, you’ll need to troubleshoot the defrost heater instead.
Step 3: How to Test Evaporator Fan Motor with a Multimeter
There are two primary types of fan motors used in residential appliances: standard 115V AC motors (found in older fridges or basic top-freezer models) and DC variable-speed motors (found in modern, high-efficiency GE, Samsung, and LG models). The testing method differs drastically for each.
Method A: Testing Standard AC Motors (2 Wires)
These are incredibly common in Whirlpool, Frigidaire, and older Kenmore units. They operate on standard 115V AC house current and usually have just two wires connected to them.
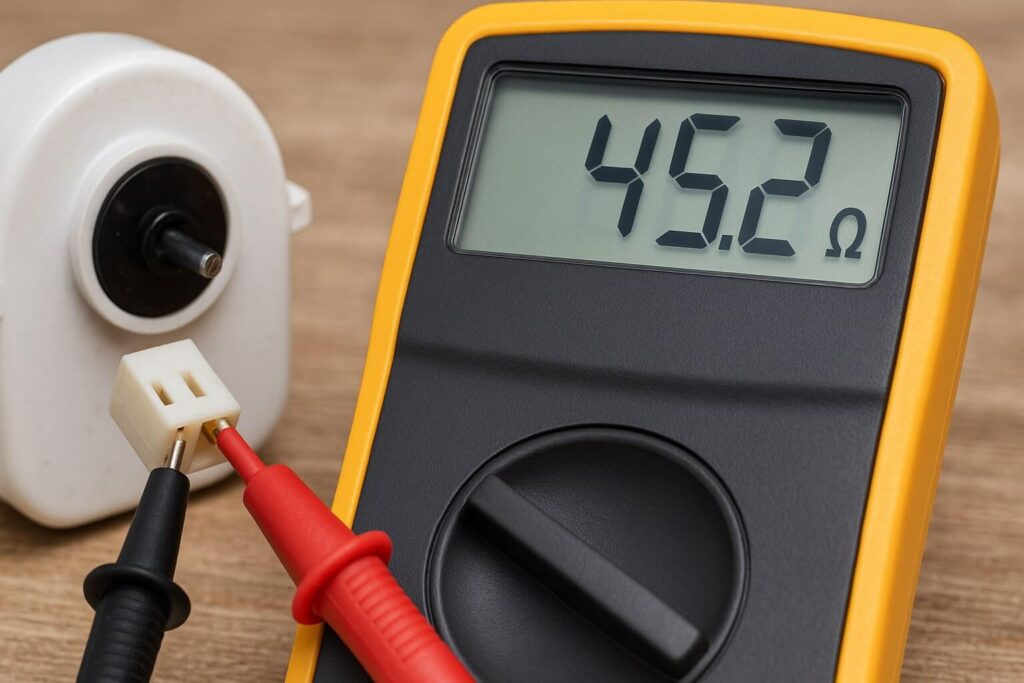
- Set the Multimeter: Turn your multimeter dial to the lowest Ohms (Ω) of resistance setting (usually 200Ω or 2kΩ depending on your meter).
- Disconnect the Harness: Unplug the plastic wire harness connecting the fan motor to the main refrigerator wiring.
- Measure the Terminals: Touch your red metal probe to one copper terminal inside the fan’s plug, and the black probe to the other terminal. Ensure the probes are making solid metal-to-metal contact.
- Analyze the Results:
- Good Reading: You should see a resistance reading somewhere between 10Ω and 150Ω (check your specific appliance tech sheet if available, but generally, any steady continuity in this range means the copper windings are intact).
- Bad Reading (Open): If the meter screen stays at “OL” (Open Loop) or displays a “1” on the far left, the internal copper wire has snapped. The motor circuit is broken and dead.
- Bad Reading (Short): If the reading is exactly 0.00Ω, the motor windings have melted together and shorted out entirely.
Method B: Testing DC Motors (3 or 4 Wires)
Modern energy-efficient fridges use Pulse Width Modulation (PWM) motors. These run on low voltage (typically 12V DC) and feature tiny internal circuit boards that allow the main computer to control their exact speed.
Note: You cannot easily test resistance (Ohms) on these advanced motors because the internal microchip interferes with the multimeter signal. Instead, you must check for live voltage getting to the fan harness.
- Safety Warning: This specific test requires the fridge to be plugged into the wall and actively running. Be extremely careful not to touch any bare live wires or the metal evaporator coils with your hands.
- Set the Multimeter: Turn your dial to DC Voltage (V with a straight line above it, not the wavy line).
- Test the Harness: With the fan disconnected and the door switch securely taped down, carefully insert your probes into the plastic wire harness coming from the back wall of the fridge (not the motor plug).
- Analyze the Results:
- Look for a steady reading of approximately 12V DC between the Red (Power) wire and the White or Black (Ground) wire.
- If you have 12V actively arriving at the plug, but the fan refuses to spin when plugged in, the fan motor is internally fried and must be replaced.
- If you have 0V arriving at the plug, the fan might be perfectly fine. The real issue is likely a burnt-out main electronic control board failing to send power.
If these electrical tests seem overwhelming or your multimeter readings are jumping erratically, consider contacting a certified appliance repair technician for a professional diagnosis.
Find the Correct Replacement Motor for Your Model on Amazon
Step 4: Checking the Fan Blade and Mounting Grommets
Sometimes, the electrical motor is in perfect working order, but the physical mounting hardware is the true source of the maddening refrigerator evaporator fan noise.
Inspect the thick rubber grommets that hold the metal motor inside the mounting bracket. Over years of enduring freezing temperatures, these rubber rings begin to dry rot, harden, and crack. When the rubber loses its elasticity, the natural vibration of the spinning motor transfers directly into the metal bracket and plastic back wall, creating a loud, echoing buzzing sound throughout your kitchen.
Replacing these cheap rubber washers—which usually cost less than five dollars—can often silence a noisy fridge instantly, saving you from buying a motor you didn’t actually need.
Installation Tips for Your New Motor
Once you have diagnosed the issue and ordered your replacement part, installing the new motor is usually a simple 10-minute job.
- Transfer the Hardware: New OEM motors often do not come with the rubber mounting grommets or the plastic fan blade. Carefully peel the rubber mounts off the old motor casing and press them onto the new one. Pull the blade straight off the old metal shaft and slide it onto the new one.
- Seat the Fan Blade Fully: Push the plastic fan blade onto the new shaft until it firmly hits the mechanical stop. If it isn’t seated deeply enough, it will stick out too far and violently rub against the plastic evaporator cover when you screw the panel back on.
- Check Wire Routing: When plugging the new harness in, ensure the delicate wires are tucked safely into their plastic retaining clips so they do not accidentally touch the sharp, spinning fan blade.
- Don’t Overtighten: When screwing the fan bracket and back panel back into the freezer wall, use gentle pressure. Overtightening steel screws into a frozen plastic liner will cause the plastic to crack instantly.
FAQ: Evaporator Fan Troubleshooting
How much does it cost to replace an evaporator fan motor?
Can I run my fridge without an evaporator fan temporarily?
Why does my fan completely stop when I open the door?
Can a bad evaporator fan cause heavy ice buildup?
Are cheap “universal” fan motors safe to use as replacements?
Conclusion: Restoring Your Airflow
Diagnosing strange refrigerator evaporator fan noise and resolving airflow issues is a rite of passage for DIY homeowners. By learning exactly how to test evaporator fan motor windings with a basic multimeter and recognizing the bad evaporator fan motor symptoms early, you can avoid the high cost of an emergency service call and confidently perform the repair yourself.
Remember, if your electrical motor tests perfectly fine but you are still seeing massive frost buildup when you remove the back panel, the issue is not the fan at all. You are dealing with a secondary failure. In this case, you will need to pivot and learn how to test your heating circuit. For more help with a fridge that just won’t stay cold, be sure to review our diagnostics guide for refrigerators that run but won’t cool to continue your troubleshooting journey.


