
Refrigerator Maintenance & Physical Fixes: The Ultimate Guide

Refrigerators are massive, incredibly heavy mechanical workhorses designed to run non-stop for decades. While delicate computer control boards and high-voltage sealed compressors frequently steal all the diagnostic attention, a shocking 70% of common cooling issues actually stem directly from simple physical hardware failures. A tiny, nearly invisible tear in a rubber door seal can completely ruin a week's worth of expensive groceries by letting hot, humid room air seep in constantly. A severely clogged defrost drain tube will aggressively flood your delicate hardwood kitchen floor with stagnant water. Furthermore, a refrigerator that is completely choked with thick condenser dust will inevitably suffer from loud, aggressive compressor vibrations and massive cooling loss. Fortunately, these specific physical problems absolutely do not require a costly degree in electrical engineering to solve safely. With a few basic hand tools, a standard heat gun, and a little bit of patience, you can completely master your appliance's hardware. This master hub is entirely dedicated to the mechanical, non-electrical upkeep of your refrigerator.

The physical body of your refrigerator inherently takes a massive amount of daily, highly repetitive abuse. Families constantly yank heavy doors open by the handles, slam them forcefully shut with their hips, and systematically overload delicate plastic interior shelves with incredibly heavy gallons of milk and glass jars. Over time, this relentless mechanical stress absolutely causes the crucial rubber perimeter gaskets to tear, the heavy-duty steel bottom hinges to sag dangerously under immense weight, and the internal water dispenser lines to aggressively freeze solid within the insulated doors.
When these specific physical hardware components eventually fail, the resulting symptoms frequently completely mimic severe, expensive electrical problems. For example, a tiny, nearly invisible tear in the rubber door seal continuously allows warm, humid kitchen air to actively rush into the freezing interior cabin. The internal thermostat detects this rapidly rising heat and actively forces the massive compressor to run continuously at 100% full power to compensate. Consequently, the heavy compressor eventually overheats, trips its thermal overload, and completely dies from sheer exhaustion. A frustrated homeowner might incorrectly assume the compressor violently broke due to an unavoidable electrical short, when in stark reality, a simple $40 piece of replacement rubber could have easily saved the entire expensive machine.
1. How to Replace a Refrigerator Door Gasket (Seal)
The door gasket is the absolutely vital rubber seal that aggressively lines the entire inner perimeter of your refrigerator and freezer doors. Essentially, this thick rubber strip contains a highly flexible magnetic insert embedded deep within its core. This magnet tightly grips the steel cabinet frame, actively creating a perfectly airtight barrier between the freezing interior and your warm, humid kitchen air. However, after years of sticky syrup spills, aggressive pulling, and constant temperature fluctuations, the rubber loses its natural elasticity. It hardens, becomes incredibly brittle, and inevitably tears directly at the corners.
The Dollar Bill Diagnostic Test
You can incredibly easily diagnose a failing gasket without purchasing any expensive specialty tools. Simply open the fridge door, completely flatten a standard US dollar bill, place it halfway inside the cabin, and aggressively close the door tightly directly on top of it. Next, gently pull the dollar bill straight out toward your body. You should immediately feel significant physical resistance from the magnetic grip actively fighting you. If the paper slips out incredibly easily without producing any friction whatsoever, the gasket has definitively failed in that specific spot. You must systematically repeat this exact test every few inches around the entire perimeter of both the fridge and freezer doors to map the weak points.

Preparing the New Rubber Seal
Installing a brand new push-in gasket is incredibly straightforward, but it strictly requires patience and thermal preparation. Crucially, replacement gaskets always arrive tightly folded up and heavily compressed in incredibly small shipping boxes. If you arrogantly try to install a cold, wrinkled gasket, it will absolutely not seal properly, and cold air will instantly pour out. You must first carefully unfold the new rubber and actively soak it in a clean bathtub filled completely with extremely hot tap water for exactly 20 minutes.
Alternatively, once you install the cold gasket onto the door, you can gently heat the heavy rubber folds directly with a standard heat gun set to a low temperature. The intense heat safely relaxes the synthetic material on a molecular level. This active relaxation allows the internal magnets to pull the rubber forward, laying it perfectly flat and flush against the steel frame for a flawless seal. Furthermore, professional technicians always rub a highly thin layer of standard petroleum jelly (Vaseline) specifically along the hinge-side of the new gasket. This critical lubrication aggressively prevents the fresh, sticky rubber from painfully rolling over on itself when the heavy door physically closes.
🛠️ Required Tool:
Why you need this: Essential for safely relaxing the shipping wrinkles out of a brand new rubber gasket so it forcefully seals properly against the metal frame without leaking cold air.
View on Amazon »2. How to Unclog a Frozen Refrigerator Water Line
Have you suddenly noticed that your front door water dispenser has completely stopped working, yet your ice maker is still producing perfectly solid cubes? Or perhaps, you can distinctly hear the electronic water inlet valve aggressively humming on the back of the fridge, but absolutely no water flows into your drinking glass? These highly frustrating, specific symptoms almost exclusively point to one single physical failure: a severely frozen dispenser water line trapped deep inside the insulated door.
The Mechanics of a Frozen Dispenser Line
In many modern refrigerators, the delicate 1/4-inch plastic water tube is routed directly through the freezer door to reach the front dispenser. If the internal freezer temperature drops dangerously low (usually below -5°F), or if the door's built-in heater circuit fails, the highly vulnerable water trapped inside that plastic straw instantly freezes solid. Consequently, this impenetrable ice plug completely blocks any further city water from reaching your glass, rendering the dispenser entirely useless.
Clearing the Ice Blockage Safely
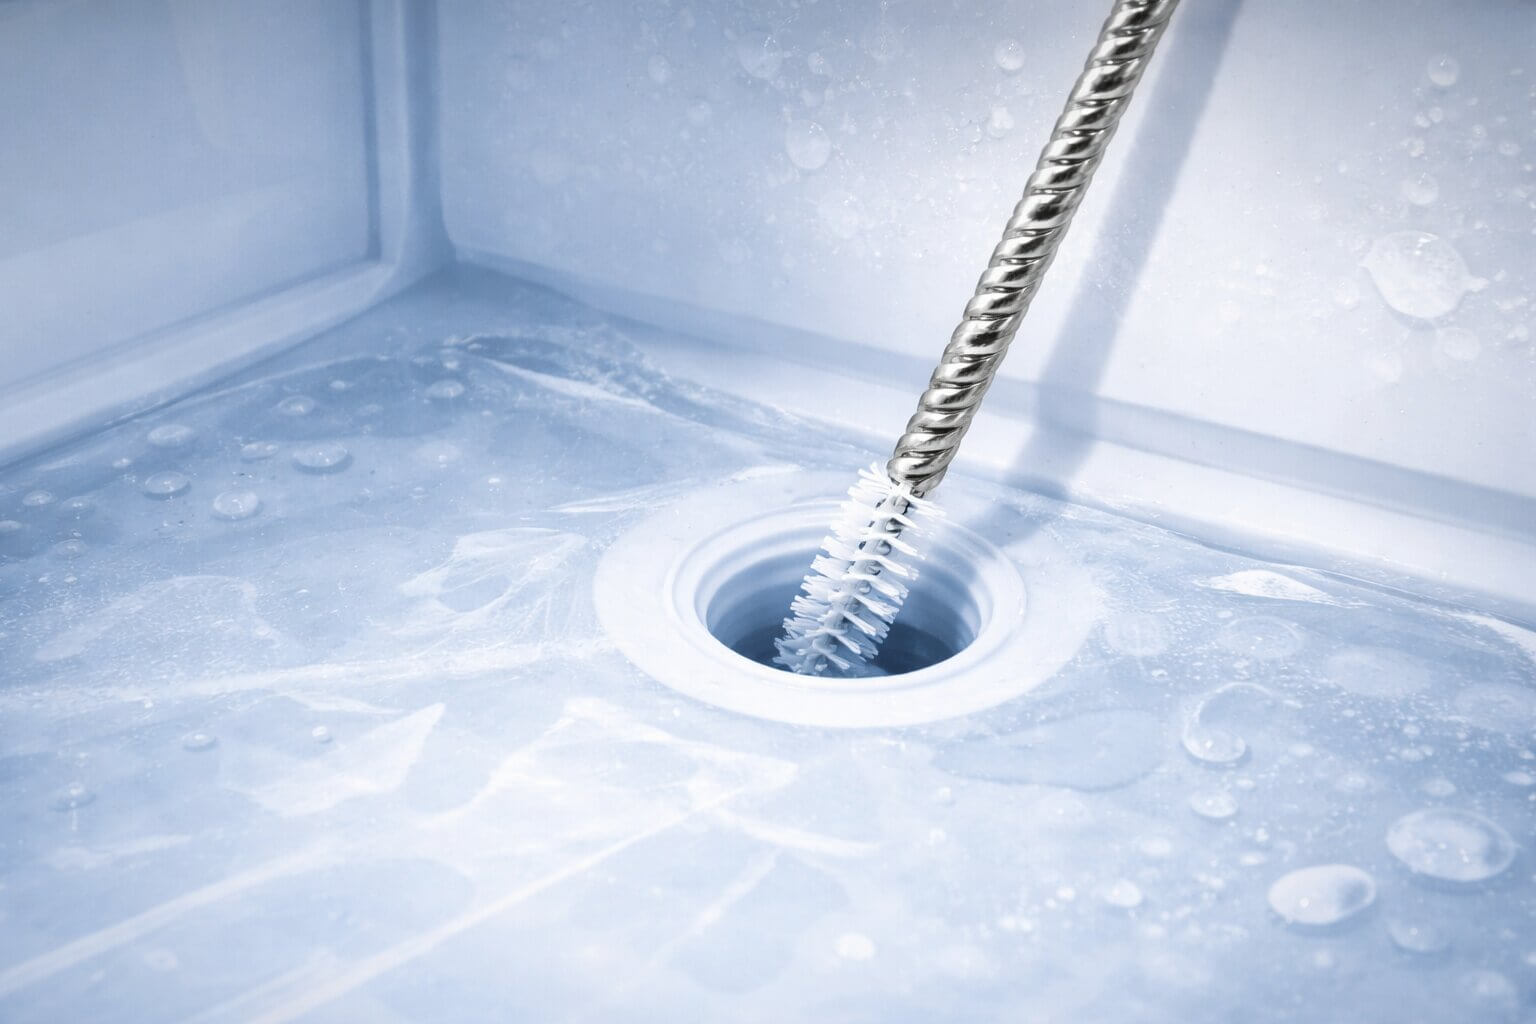
When the delicate tube freezes, you absolutely cannot use sharp tools or hair dryers to melt it. Using a high-heat hair dryer directly on the thin plastic interior door liner will instantly and permanently warp the cosmetic finish. To permanently fix this issue safely, you must utilize the hot-water injection method. First, purchase a specialized, high-pressure cleaning syringe equipped with a highly flexible, thin plastic catheter tube.
Next, fill the syringe entirely with extremely hot tap water. Snake the thin catheter directly up into the frozen dispenser nozzle from the outside of the door until it physically stops against the solid ice plug. Forcefully squirt the boiling water directly against the frozen blockage to violently melt the solid ice. You must slowly push the catheter further up the line as the ice melts, repeatedly injecting hot water until the entire tube is completely clear and the water flows freely once again.
🛠️ Required Tool:
Water Line Syringe Cleaning Tool Kit
Why you need this: Provides the exact high-pressure hot-water syringe and highly flexible catheter snake required to completely melt deep ice blockages safely without melting your door liner.
View on Amazon »3. Why Are There Black Specks in My Refrigerator Water?
It is an incredibly alarming experience. You confidently push your glass against the dispenser paddle, expecting a highly refreshing drink of crisp, cold water. Instead, you look down to find dozens of mysterious, tiny black specks violently swirling around the bottom of your glass. This deeply unsettling visual immediately causes homeowners to panic, incorrectly assuming their expensive refrigerator is actively breeding toxic black mold or dangerous bacteria inside the hidden plumbing lines.
The Truth About Carbon Filter Flaking
Fortunately, in exactly 99% of all documented residential cases, these tiny black particles are completely harmless and strictly non-toxic. They are simply microscopic pieces of activated carbon that have physically broken loose directly from inside your refrigerator's brand-new water filter. Modern water filters utilize a highly compressed, solid block of activated charcoal to aggressively trap harsh municipal chlorine and heavy chemical metals. When you install a brand new, completely dry filter cartridge, the sudden, violent rush of highly pressurized city water aggressively shocks the dry carbon block, causing tiny surface flakes to violently shear off and travel directly into your drinking glass.
The Mandatory Flushing Procedure
To completely eliminate these highly annoying black specks, you must aggressively purge the entire internal plumbing system immediately after every single filter change. Because the carbon dust acts exactly like loose sand inside a garden hose, it actively continues to slowly push out of the nozzle long after the initial installation. You must hold a large plastic pitcher against the dispenser paddle and run exactly three to five full gallons of water through the system continuously. Furthermore, if the black specks strangely appear incredibly slimy, rather than hard and granular like sand, you may actually have deteriorating rubber O-rings inside the primary water inlet valve. In this rare scenario, the entire plastic valve assembly located on the back of the fridge must be unbolted and fully replaced.
4. How to Read Refrigerator Evaporator Frost Patterns
When an aging refrigerator suddenly begins to lose its cooling capacity, the absolute fastest, most highly definitive diagnostic strategy requires you to physically remove the internal rear freezer panel to expose the silver evaporator coils. Once exposed, you must carefully analyze exactly how the white frost is physically forming across the complex copper and aluminum tubing. The highly specific visual pattern of this ice buildup serves as the refrigerator’s ultimate, undeniable mechanical fingerprint, telling you exactly which physical or electrical component has catastrophically failed.
The Perfect, Healthy Frost Pattern
A perfectly healthy, highly efficient cooling system produces a beautifully even, microscopically thin layer of powdery white frost perfectly coating every single inch of the entire evaporator coil assembly. This even distribution proves that the chemical Freon is boiling perfectly evenly throughout the entire loop, and the internal defrost heater is successfully melting the thick buildup away every eight hours. However, if you observe anything other than this highly uniform coating, the machine is in critical diagnostic danger.
Diagnosing the Solid Ice Ball vs. Partial Frost
For example, if you discover a massive, incredibly heavy ball of solid, clear ice aggressively forming directly at the top right corner where the capillary tube enters the coil—while the entire bottom half of the coil remains completely bare, warm, and frost-free—you have a definitively confirmed, catastrophic sealed system Freon leak. The compressor simply lacks enough chemical gas to fill the entire coil. Conversely, if the entire coil is completely entombed inside a massive, impenetrable glacier of solid white snow that physically blocks the spinning fan blades, your automated electrical defrost system (the heater tube or the bimetal thermostat) has completely failed to turn on. Learning to read these physical frost patterns instantly separates amateur guesswork from professional appliance mastery.
5. How to Clean Refrigerator Condenser Coils (The Ultimate Guide)
Consistent, highly aggressive physical maintenance represents the absolute best, most incredibly cost-effective way to massively extend the lifespan of your heavy appliance. The fundamental physical laws of thermodynamics strictly dictate that when your heavy compressor rapidly squeezes chemical Freon gas into a high-pressure liquid, it violently generates a massive amount of physical heat. This intense thermal energy must be immediately exhausted out into your kitchen environment through the complex, winding steel condenser coils located at the very bottom base of the unit.
The Dangers of Suffocating Heat Load
Because these incredibly vital condenser coils sit mere inches from your kitchen floor, they act exactly like a powerful, relentless vacuum cleaner. Over just six months, the intricate steel cooling fins become heavily caked and completely choked in a thick, highly insulating blanket of shedding pet hair, dense household dust bunnies, and sticky aerosolized cooking grease. If the small rear condenser fan motor cannot physically push cool room air through this massive blockage, the immense generated heat has absolutely nowhere to escape. The heavy compressor essentially bakes itself alive in its own thermal energy, drastically increasing your monthly electrical bills before eventually dying from sheer heat exhaustion.
The Critical Coil Vacuum Routine
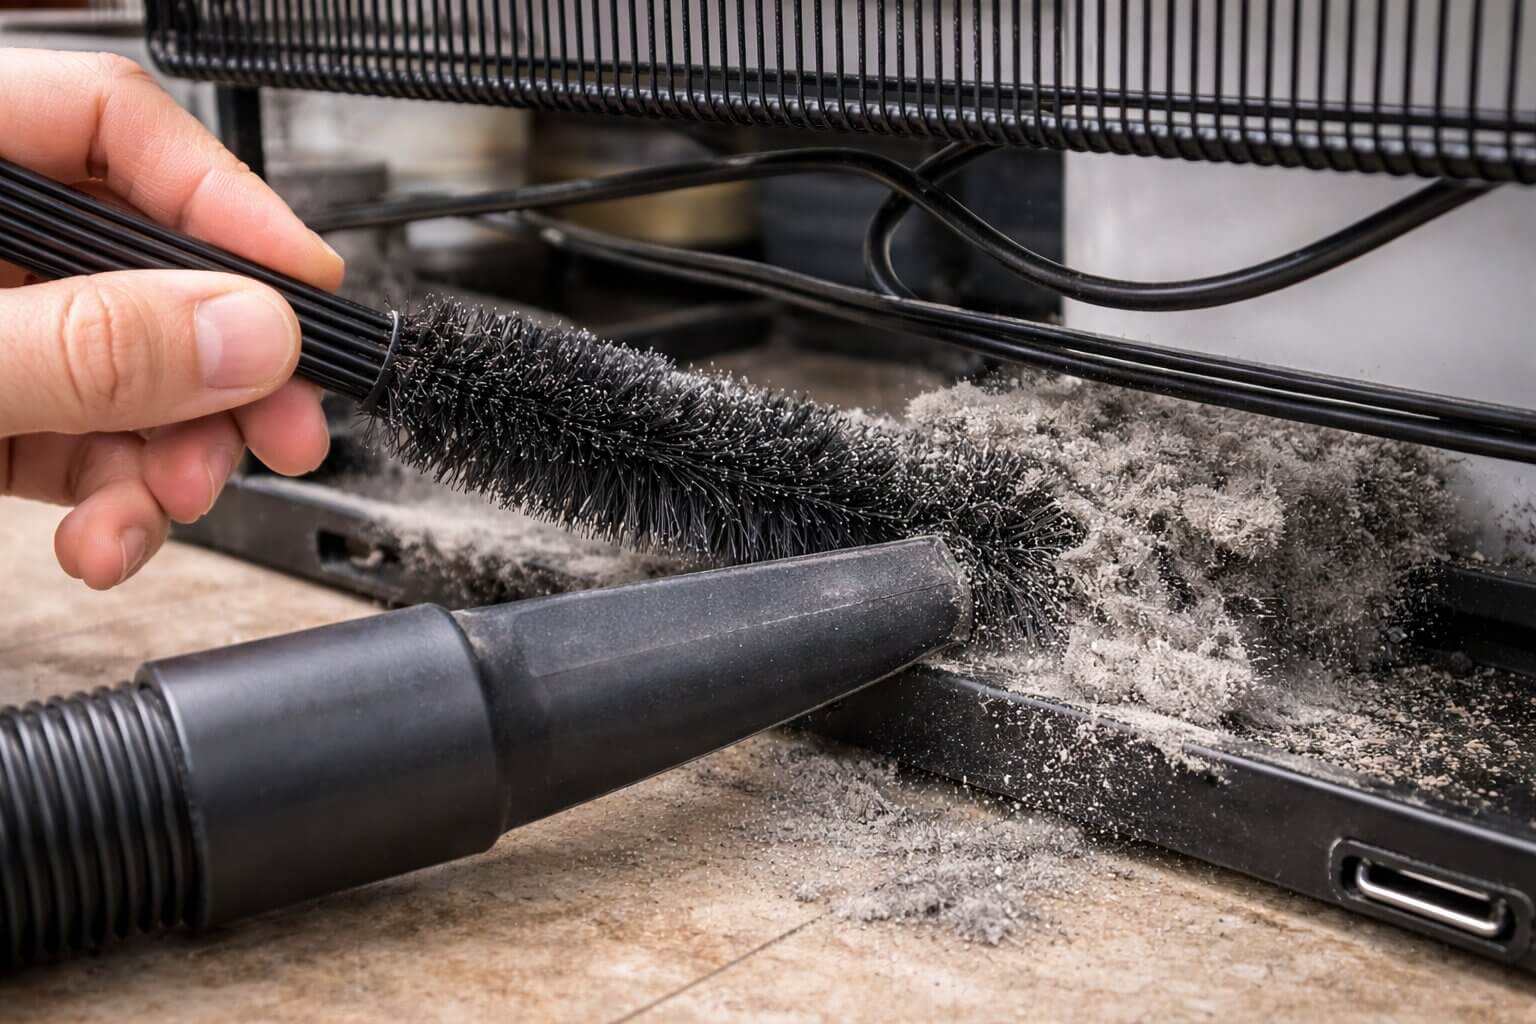
You must safely unplug and physically pull the heavy machine completely away from the kitchen wall at least twice a year. Next, you must utilize a highly specialized, long, flexible coil brush to aggressively dislodge the incredibly thick, suffocating dust wrapped tightly around the hot steel fins. A standard vacuum nozzle alone absolutely cannot reach deep into the tightly packed steel tubing. You must physically scrub the grease loose with the stiff bristles first, and then immediately use a high-powered shop vacuum to safely suck this loose debris away entirely.
🛠️ Required Tool:
Why you need this: A vacuum alone absolutely cannot reach deep into the tightly packed steel fins. This long, stiff brush actively scrubs away the greasy dust suffocating your highly expensive compressor motor.
View on Amazon »6. How to Troubleshoot a Refrigerator That Runs Constantly
A perfectly healthy, highly efficient modern refrigerator operates on a strict, computerized duty cycle. It should actively run its heavy compressor and internal circulation fans for roughly thirty to forty minutes to successfully reach the target temperature, definitively shut off completely, and rest in total silence until the ambient temperature inside the sealed cabin eventually rises again. However, if your refrigerator is aggressively running constantly—often referred to in the repair industry as "short cycling" or "continuous running"—it is desperately fighting a losing battle to maintain its delicate internal climate.
The High Cost of Continuous Running
A massive appliance that absolutely never stops running is a highly serious, incredibly destructive mechanical problem. Not only will this exact issue cause a massive, highly painful spike in your monthly electricity bill, but it actively forces the heavy mechanical compressor to work far beyond its specifically engineered duty cycle. This constant, unrelenting physical strain continuously generates excessive heat and intense metal-on-metal wear. Inevitably, this continuous operation will prematurely burn out the compressor windings entirely, turning a simple DIY diagnostic repair into a highly expensive, catastrophic total appliance replacement.
Identifying the Root Causes of Overworking
The absolute root cause of continuous running is usually twofold: either incredibly warm room air is continuously infiltrating the sealed cabin (forcing the unit to run constantly to compensate), or a highly faulty sensor is falsely telling the main computer that the fridge is much warmer than it actually is. First, as detailed in Section 1, you must aggressively test your rubber door gaskets. If the seals are physically cracked, ambient heat pours inside 24/7. Secondly, as detailed in Section 5, if your lower condenser coils are entirely suffocated by dust, the heat exchange process is severely limited, forcing the compressor to run nonstop just to achieve minimal cooling. Finally, you must use a digital multimeter to definitively test the internal thermistor sensors, as a shorted sensor will blindly command the fridge to freeze your food solid without ever shutting off.
7. Fridge Lifespan & Ultimate Maintenance Tips
The vast majority of homeowners completely ignore their incredibly heavy, highly expensive refrigerator until the exact moment it violently stops cooling and their expensive groceries begin to aggressively spoil. However, treating your massive kitchen appliance with the exact same strict, highly preventative care you give your automobile will undeniably double its reliable physical lifespan and successfully save you thousands of dollars in emergency weekend repair bills. Preventative physical maintenance actively reduces the daily mechanical strain placed directly on the compressor, the delicate rubber gaskets, and the internal plastic structures.
Protecting the Delicate Internal Plastics
Beyond cleaning the critical lower condenser coils, you must actively protect the delicate internal plastics from catastrophic shattering. Modern refrigerator shelves primarily utilize thick tempered glass securely wrapped in incredibly thin, rigid plastic frames. Dropping heavy glass jars or heavily overloading door bins inevitably snaps these support rails. If the plastic cracks, you must immediately purchase a dedicated, highly specialized food-safe plastic epoxy to successfully repair the hairline fracture before it spreads. Standard super glues will violently shatter again in sub-zero freezing temperatures.
🛠️ Required Adhesive:
Why you need this: Standard household glues instantly snap in sub-zero freezing temperatures. You absolutely must use a highly cold-resistant, totally non-toxic epoxy designed specifically for repairing refrigerator plastics and safely supporting heavy weight.
View on Amazon »Sanitizing and Gasket Care
Furthermore, you must actively protect the incredibly delicate rubber door gaskets. Sticky syrup spills and dried juice physically glue the rubber directly to the metal frame overnight. When you aggressively pull the heavy door open the next morning, the sticky syrup violently rips the fragile rubber entirely in half. You must aggressively scrub the gaskets monthly using warm soapy water and an old toothbrush to remove stickiness. Finally, always ensure you leave an absolute minimum of one inch of clear physical space between the back of the refrigerator and the drywall. This critical physical gap actively guarantees the rear condenser fan can properly exhaust the massive heat load directly into the room without suffocating.
8. How to Fix a Refrigerator Door That Pops Open or Sags
You firmly close the main refrigerator door, confidently turn around to walk away, and suddenly hear a distinct, highly frustrating soft "pop." You look back in anger to see the freezer door actively hanging an inch wide open. This incredibly common, highly elusive issue actively causes massive energy loss, forces the compressor to run endlessly, and rapidly ruins expensive frozen food. Fortunately, this specific issue is rarely caused by a broken electrical part. Instead, it is almost entirely an issue of internal air pressure transfer and worn physical hardware hinges.
Understanding Air Pressure Transfer
Modern high-end refrigerator cabins are designed to be completely airtight to maximize energy efficiency. When you slam the massive fresh food door shut, you instantly force a massive, heavy volume of room-temperature air directly into the sealed cabin. Because this displaced air absolutely cannot escape through the incredibly tight rubber gaskets, it violently travels through the internal plastic cooling vents directly into the freezer compartment. This sudden, intense barometric pressure spike aggressively pushes the freezer door wide open from the inside out, exactly like squeezing a balloon.
The Step-by-Step Fix for Sagging and Popping Doors
While utilizing a magnetic torpedo level to aggressively tilt the fridge slightly backward helps gravity fight this intense pressure spike, the ultimate physical fix involves the heavy door hinges themselves. At the very bottom of the heavy steel door hinge sits a small, incredibly important nylon plastic "cam." This specific plastic piece features a highly distinct, engineered slope that actively forces the heavy door to physically pull itself tightly closed when it gets within a few inches of the frame. Over years of heavy use, this plastic slope becomes completely dry, creates immense physical friction, or wears completely flat from the weight of loaded door bins.
Because this is such a critical and common physical repair, here is the exact, step-by-step professional method to fix your popping or sagging doors right now without needing to click away to another guide:
- Empty the Door Completely: Massive French doors are incredibly heavy. You must aggressively remove every single gallon of milk, juice jug, and heavy condiment bottle from the internal plastic bins to safely reduce the lifting weight and prevent accidental shattering.
- Remove the Top Hinge Bracket: Recruit a strong helper to hold the door steady. Use a socket wrench to carefully unbolt the top steel hinge plate securing the door to the cabinet roof. If there are water lines running through the hinge to the dispenser, depress the plastic collet ring to safely release the 1/4-inch tubing first.
- Safely Lift the Door Off: With your helper, physically lift the massive door straight up and entirely off the bottom mounting pin. Carefully lay the heavy door safely on a thick, soft blanket on the floor to protect the stainless steel finish from scratching.
- Inspect and Clean the Nylon Cams: Locate the interlocking nylon cams (there is one mounted on the bottom of the door, and one stationary cam on the floor hinge pin). Aggressively clean them with rubbing alcohol to remove old, sticky grime. Inspect the sloped ramps. If the plastic is physically cracked or ground completely flat, you must unscrew them and bolt on a brand new OEM hinge cam assembly.
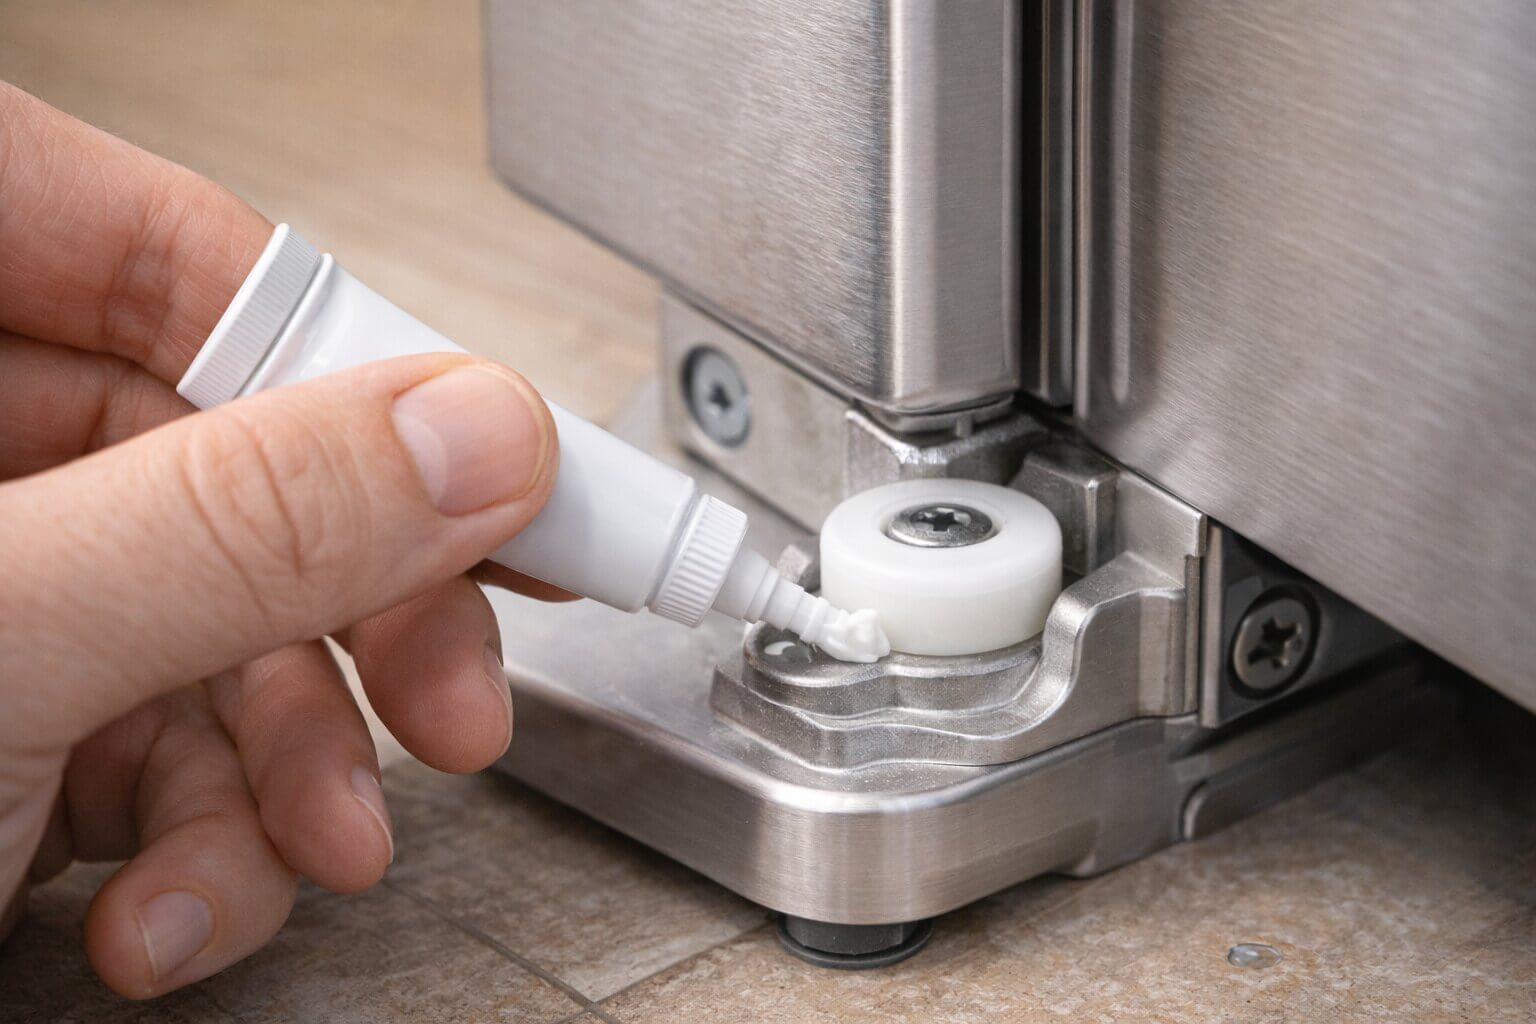
- Apply Silicone Grease: If the plastic slopes are still structurally intact, you must apply a thick, generous layer of specialized food-safe silicone grease directly onto both cam surfaces. This intense lubrication actively allows the heavy door to violently snap shut and firmly hold its magnetic position against rushing internal air pressure.
- Reassemble and Test the Seal: Carefully lift the heavy door back onto the bottom pin, perfectly align the top, re-secure the steel hinge plate, and firmly tighten the bolts. Open and close the door; it should glide perfectly smoothly and autonomously snap shut during the very last few inches of travel.
🛠️ Required Lubricant:
Why you need this: Standard garage lubricants like WD-40 will quickly dissolve and aggressively degrade the sensitive nylon hinge plastic. You absolutely must use thick, specialized food-safe silicone grease to permanently restore the door's snappy closing action without ruining the parts.
View on Amazon »9. Frequently Asked Questions (FAQ)
How often should I aggressively clean the condenser coils on my refrigerator?
How long do rubber refrigerator door gaskets typically last before tearing?
Can I use standard household super glue to fix a cracked plastic refrigerator drawer?
Why is there a massive pool of water forming under my fresh food crisper drawers?
Why does my refrigerator violently rock back and forth when I open the door?